Windows Server 2016のMicrosoft Updateに表示されないので、手動インストールします。
※事前にMicrosoft Update Catalogのプラグインはインストールしておきましょう。
Update Rollup 1 for System Center 2016 Operations Managerに貼られているリンク先にアクセスしします。Managent Server、Web Console、管理コンソールのファイルが用意されています。全部Addします。
[view basket]をクリックします。

[Download]ボタンをクリックします。

とりあえずダウンロードフォルダーにダウンロードします。

ダウンロード中。

ダウンロード完了。


Management Serverから修正プログラムを適用します。
ファイルをクリックすると

mspファイルが表示されます。さらにmspファイルをクリックすると、

解凍先を聞かれるので、ダウンロードフォルダーを指定します。

解凍完了。

mspファイルを実行しますが、表示されるのは、下記のダイアログのみ。

上記の手順と同様に、Webコンソールに修正プログラムを適用します。


mspファイルを実行しますが、表示されるのは、やっぱり下記のダイアログのみ。

上記の手順と同様に、管理コンソールに修正プログラムを適用します。


mspファイルを実行しますが、表示されるのは、やっぱり下記のダイアログのみ。

うーん、2016になっても、SQLスクリプトの実行が必要ですか。。。
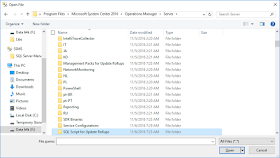
SQL Management Studioから、SQLスクリプトを開きます。


Update Rollup 1 for System Center 2016 Operations Managerに書かれているファイル名と違う。。。Update Rollup 1 for System Center 2016 Operations Managerの記載が間違っていると考え、このファイルを開きます。
冒頭に
use OperationsManager;
go
を追加し、実行します。

実行完了。エラー無し。

管理パックをディスクからインポートします。

依存関係を解決するため、オンラインカタログを使います。

インポートする管理パックを選択します。

警告が出ているので解決します。

IISの管理パックが追加されますね。

インポート開始。

すでにインポート済みであるため、ダイアログが表示されます。インポートを継続するため、[Yes]を押します。

管理パックのインポート自体は、3分ほどで終了しました。

0 件のコメント:
コメントを投稿