Azure Stack deployment prerequisitesでシステム要件はチェック済みとの想定で、お読みください~
すでにデプロイしている方も多数いらっしゃると思いますが、固定IPアドレスを用いていたケースも参考になるかと思い、本稿をアップロードします。
TP3をデプロイしていた環境なので、事前にBCDEDITにてブート順を戻し、TP3の仮想ハードディスクは削除しておきました。
実施内容は、
Deploy the Azure Stack Development Kit
に記載ある部分。(ダウンロードのは割愛してますが)
※Register Azure Stack with your Azure Subscriptionは、含まれておりません。
ダウンロードしたMicrosoftAzureStackPOC.exeを実行するところから。


これで、仮想ハードディスクが展開できましたので、c:\に移動しておきます。(容量に余裕あればコピーがおすすめ)

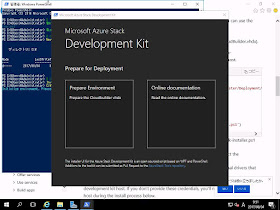
Deploy the Azure Stack Development Kitの項番5に記載のPowerShellを実行します。


展開した仮想ハードディスクがブートできるようになっていないので、ここは[Prepare Environment]をクリックします。

仮想ハードディスクの位置を指定して、[Next]ボタンを押します。
※特にデバイスドライバーが必要なストレージではないので、下のチェックボックスは既定のまま。

ローカル管理者のパスワードを投入。固定IPアドレスで使う環境なので、[Static IP configuration]をチェックし、[Next]ボタンを押します。

現在のIPアドレスを確認しておきます。

確認したIPアドレスのNICを選択し、[Next]ボタンを押します。

現在起動しているOSのIPアドレスなどと同じにして、[Next]ボタンを押します。

環境準備が整ったことを確認し、[Next]ボタンを押します。

仮想ハードディスクから起動するので、再起動します。

再起動しました。ここから日本時間表示ではなくなります。
※日本時間で午前10:21でした。

ドライブレターが変わっていますのでそこは確認の上、\AzureStack_Installer\asdk-installer.ps1を起動します。

今度は[Install]をクリックします。

Azure ADを使うのでIdentity Providerを指定し、ローカル管理者のパスワードを投入。[Next]ボタンを押します。

使用するNICを指定し、[Next]ボタンを押します。

Azure Stack Development Kit内ネットワークの境界となるBGPNAT01で使うIPアドレス情報を指定します。こちらも固定IPアドレスを指定。DNSも指定。Time Serverも指定してもよかったかも。[Next]ボタンを押します。

NICのプロパティを検証中。

検証が完了したら、[Next]ボタンを押します。

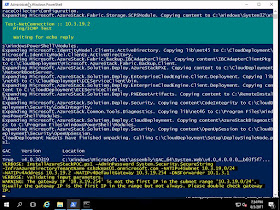
デプロイの準備でしたので、[Deploy]ボタンを押します。

先ほど指定した固定IPアドレスですが、ping送信して存在しないことを確認していますね。
DNSフォワーダーを設定している模様。
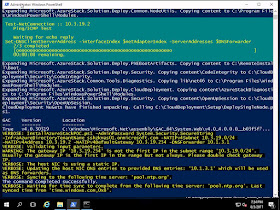
Azure ADに認証。先ほど指定したAzure ADの管理者アカウント(Azure Stackの管理者アカウントとするもの)を入力し、サインインします。

引き続きデプロイ。

ハードウェアのストレージインタフェースを検出した模様。

この後、放置していましたが、
5時間弱ほどでデプロイ完了。

COMPLETE: Action ‘Deployment’. が表示されていれば良い旨、Deploy the Azure Stack Development KitのDeploy the development kit→項番12に記載あります。
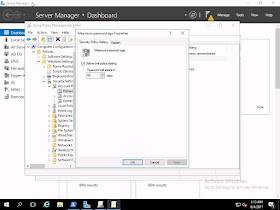
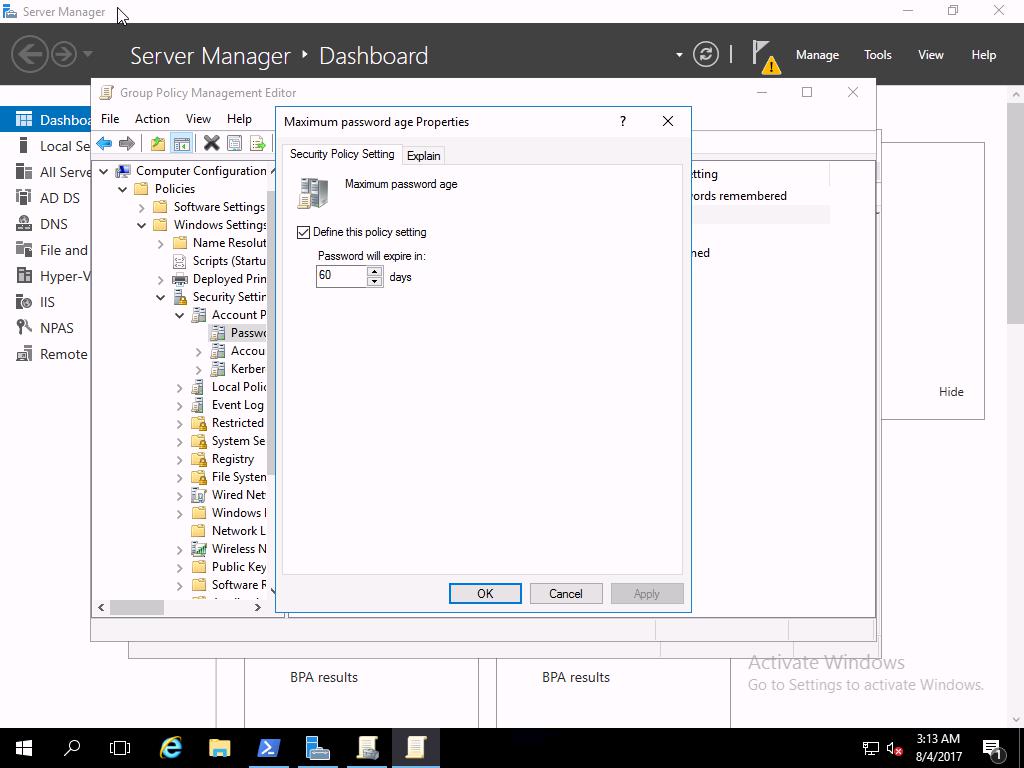
Deploy the Azure Stack Development Kitの最後、Reset the password expiration to 180 daysにあるパスワード期間を180日へ延長する作業を実施しておきます。

ここまでできれば、Register Azure Stack with your Azure Subscriptionを実行すればOK。
すでにデプロイしている方も多数いらっしゃると思いますが、固定IPアドレスを用いていたケースも参考になるかと思い、本稿をアップロードします。
TP3をデプロイしていた環境なので、事前にBCDEDITにてブート順を戻し、TP3の仮想ハードディスクは削除しておきました。
実施内容は、
Deploy the Azure Stack Development Kit
に記載ある部分。(ダウンロードのは割愛してますが)
※Register Azure Stack with your Azure Subscriptionは、含まれておりません。
ダウンロードしたMicrosoftAzureStackPOC.exeを実行するところから。


これで、仮想ハードディスクが展開できましたので、c:\に移動しておきます。(容量に余裕あればコピーがおすすめ)

Deploy the Azure Stack Development Kitの項番5に記載のPowerShellを実行します。


展開した仮想ハードディスクがブートできるようになっていないので、ここは[Prepare Environment]をクリックします。


仮想ハードディスクの位置を指定して、[Next]ボタンを押します。
※特にデバイスドライバーが必要なストレージではないので、下のチェックボックスは既定のまま。

ローカル管理者のパスワードを投入。固定IPアドレスで使う環境なので、[Static IP configuration]をチェックし、[Next]ボタンを押します。

現在のIPアドレスを確認しておきます。

確認したIPアドレスのNICを選択し、[Next]ボタンを押します。

現在起動しているOSのIPアドレスなどと同じにして、[Next]ボタンを押します。

環境準備が整ったことを確認し、[Next]ボタンを押します。

仮想ハードディスクから起動するので、再起動します。

再起動しました。ここから日本時間表示ではなくなります。
※日本時間で午前10:21でした。

ドライブレターが変わっていますのでそこは確認の上、\AzureStack_Installer\asdk-installer.ps1を起動します。

今度は[Install]をクリックします。

Azure ADを使うのでIdentity Providerを指定し、ローカル管理者のパスワードを投入。[Next]ボタンを押します。

使用するNICを指定し、[Next]ボタンを押します。

Azure Stack Development Kit内ネットワークの境界となるBGPNAT01で使うIPアドレス情報を指定します。こちらも固定IPアドレスを指定。DNSも指定。Time Serverも指定してもよかったかも。[Next]ボタンを押します。

NICのプロパティを検証中。

検証が完了したら、[Next]ボタンを押します。

デプロイの準備でしたので、[Deploy]ボタンを押します。

先ほど指定した固定IPアドレスですが、ping送信して存在しないことを確認していますね。

DNSフォワーダーを設定している模様。

Azure ADに認証。先ほど指定したAzure ADの管理者アカウント(Azure Stackの管理者アカウントとするもの)を入力し、サインインします。

引き続きデプロイ。

ハードウェアのストレージインタフェースを検出した模様。

この後、放置していましたが、
5時間弱ほどでデプロイ完了。

COMPLETE: Action ‘Deployment’. が表示されていれば良い旨、Deploy the Azure Stack Development KitのDeploy the development kit→項番12に記載あります。
Deploy the Azure Stack Development Kitの最後、Reset the password expiration to 180 daysにあるパスワード期間を180日へ延長する作業を実施しておきます。

ここまでできれば、Register Azure Stack with your Azure Subscriptionを実行すればOK。
0 件のコメント:
コメントを投稿