Update Rollup 6 for System Center 2016 が公開されました
みて、公開されたことに気づく。。。
Update Rollup 6 for System Center 2016 Operations Manager 入れます。
Update Rollup 6 for System Center 2016 Operations Manager に従って進めます。
アップデーターは、Windows Update Catlog より手動ダウンロードします。


MSPファイルを取り出します。

下記の順で、msiexec /update MSPファイル名で適用していきます。すなわち本環境には、下記のロールだけを入れています。
Management server or servers → Web console server role computers → Operations console role computers → Reporting


Management Serverの適用後、再起動が必要です!


毎度おなじみ、SQL スクリプトを適用します。


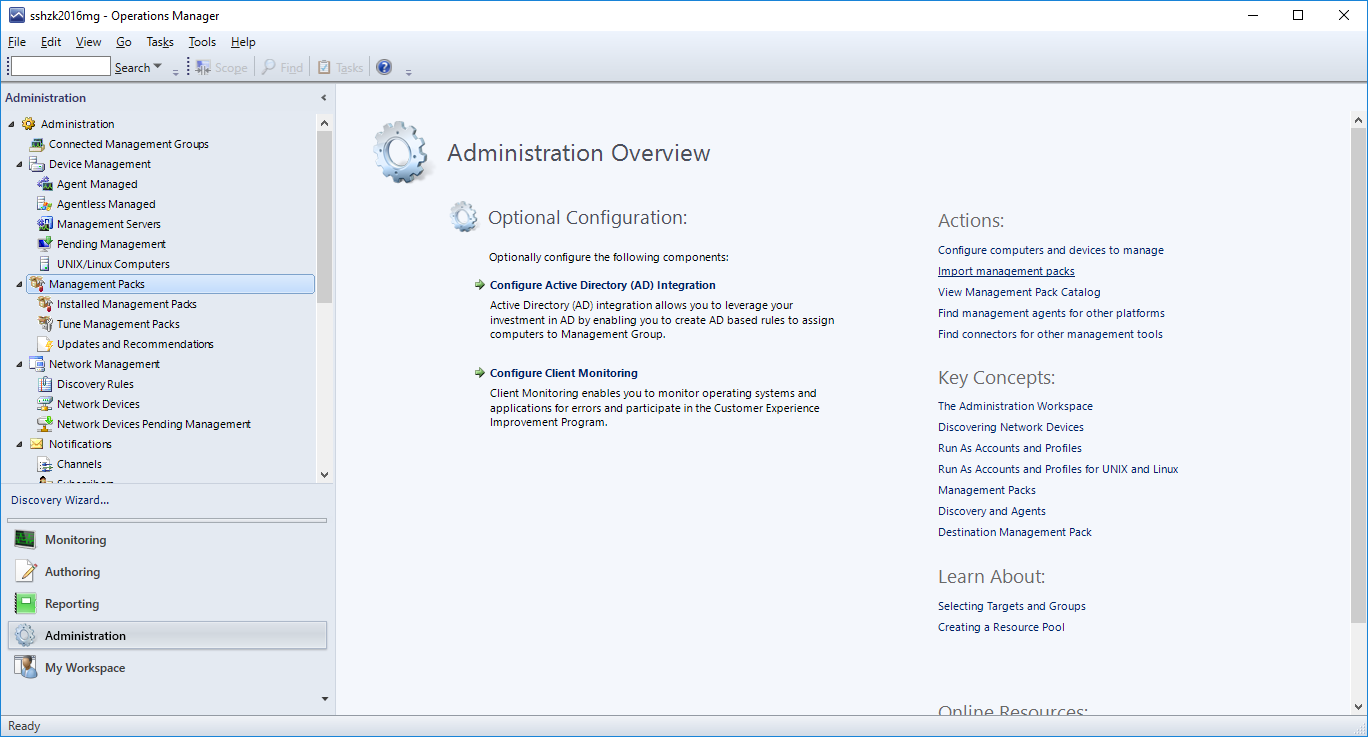
管理パックをアップデートします。

[Import management packs]をクリックします。

ディスクから管理パックを読み込みます。

管理パックの依存関係を解消するため、オンラインカタログを参照します。

いったんすべての管理パックを選択します。

一部の管理パックを削除しないと、[Install]ボタンが有効になりませんので、ご注意ください。
Update Rollup 6 for System Center 2016 Operations Managerにインポート対象の記載がありますので、そちらを選択するのが正しいです。
[Install]ボタンを押して、インポート開始。

念押しの確認は、[Yes]ボタンを押します。

約10分ほどで、インポート完了。

https://buildnumbers.wordpress.com/scom/#2016でbuild番号が確認できます。このあたりのタイミングで確認しておくと良さそう。
UNIX/Linux 管理パックが導入済みなので、こちらもアップデートします。
System Center Management Pack for UNIX and Linux Operating Systems
からダウンロードします。

上記、画面イメージ中に記載ありますが、SCOM SAC 1801、1807用の管理パックもあります。
UNIX/Linux 管理パックは、環境都合で、Eドライブに展開します。


先ほどと同じように管理パックのインポートを行います。ここでは、Linuxだけアップデートします。
※ここでも一部の管理パックを削除しないと、[Install]ボタンが有効にならないかも。2018/9/9付けのファイルを選んでみてください。


約12分でインポート完了。

SCOM Agnet/Microsoft Monitoring Agentは、Windows Updateでもアップデート可能です。SCOMからプッシュしたSCOM Agnet/Microsoft Monitoring Agentは、SCOMからアップデートできます。
別途行っておきましょう。
みて、公開されたことに気づく。。。
Update Rollup 6 for System Center 2016 Operations Manager 入れます。
Update Rollup 6 for System Center 2016 Operations Manager に従って進めます。
アップデーターは、Windows Update Catlog より手動ダウンロードします。


MSPファイルを取り出します。

下記の順で、msiexec /update MSPファイル名で適用していきます。すなわち本環境には、下記のロールだけを入れています。
Management server or servers → Web console server role computers → Operations console role computers → Reporting


Management Serverの適用後、再起動が必要です!


毎度おなじみ、SQL スクリプトを適用します。


管理パックをアップデートします。

[Import management packs]をクリックします。
ディスクから管理パックを読み込みます。

管理パックの依存関係を解消するため、オンラインカタログを参照します。

いったんすべての管理パックを選択します。

一部の管理パックを削除しないと、[Install]ボタンが有効になりませんので、ご注意ください。
Update Rollup 6 for System Center 2016 Operations Managerにインポート対象の記載がありますので、そちらを選択するのが正しいです。
[Install]ボタンを押して、インポート開始。

念押しの確認は、[Yes]ボタンを押します。

約10分ほどで、インポート完了。

https://buildnumbers.wordpress.com/scom/#2016でbuild番号が確認できます。このあたりのタイミングで確認しておくと良さそう。
UNIX/Linux 管理パックが導入済みなので、こちらもアップデートします。
System Center Management Pack for UNIX and Linux Operating Systems
からダウンロードします。

上記、画面イメージ中に記載ありますが、SCOM SAC 1801、1807用の管理パックもあります。
UNIX/Linux 管理パックは、環境都合で、Eドライブに展開します。


先ほどと同じように管理パックのインポートを行います。ここでは、Linuxだけアップデートします。
※ここでも一部の管理パックを削除しないと、[Install]ボタンが有効にならないかも。2018/9/9付けのファイルを選んでみてください。


約12分でインポート完了。

SCOM Agnet/Microsoft Monitoring Agentは、Windows Updateでもアップデート可能です。SCOMからプッシュしたSCOM Agnet/Microsoft Monitoring Agentは、SCOMからアップデートできます。
別途行っておきましょう。
0 件のコメント:
コメントを投稿