2017年12月24日日曜日

Project Honolulu Technical Preview 1712 Build 05002 の新機能を見てみる

Announcing Project Honolulu Technical Preview 1712 Build 05002
出てます。
上記に寄れば今回の目玉は、仮想マシン周りの設定やチェックポイントができるようになったことです。
Nested Hyper-Vの設定もできるとあります。

※インストールは特に変わりないので、省略。

では早速、機能追加部分を見ていきます。言うまでもありませんが、テクニカルプレビューですので、あくまでも現時点でのas isです。今後のこの通りとなるかは明確ではありませんから。
※停止した仮想マシンで画面を見ています、あしからず。

名前、自動開始アクション、自動停止アクションが一緒になった感じ。クリティカルエラー時の自動アクションはプラスアルファの機能ですね。


サイズ表記の違いはあるものの、メモリーの画面は同様です。


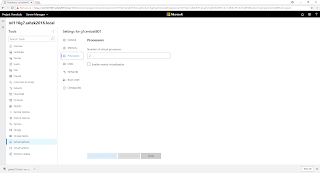
プロセッサーは、仮想プロセッサとNested Virtualizationの設定があるのみと非常にシンプル。


第一世代仮想マシンのディスク構成画面。


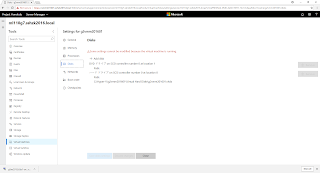
第二世代仮想マシンのディスク構成画面。この仮想マシンは稼働中のため、設定変更できない旨警告メッセージが表示されています。


ネットワークは、Advancedの画面含め、設定としてはサブセットの留まる感じ。


第一世代のBIOSブート設定。

第二世代のUEFIブート設定。


チェックポイントの設定画面。Automatic Checkpointって初めて聞くぞ?


仮想マシンのインベントリーに戻り、チェックポイントや設定以外にメニューがないか見てみます。[Set up VM Protection]なる項目があります。


クリックしてみたら、Azure Site Recoveryへ誘導されました。


以上~

2017年12月16日土曜日

Windows Server Insider Preview Build 17046でHCIを構成

Windows Server Insider Preview Build 17046では、インストール時の挙動が少し変わりました。Windows Server 2016 RTMと同じ挙動になった部分があります。
そこを中心にインストールを追っかけてみます。

Windows Server Insider Preview Build 17046を4台用意し、127GBの仮想ハードディスク4台を各々の仮想マシンへマウントしておきます。

Nested Hyper-V用に下記のコマンドレットをHyper-Vホストから実行します。
Set-VMProcessor -VMName g2wsip17046s2d1 -ExposeVirtualizationExtensions $true
Get-VMNetworkAdapter -VMName g2wsip17046s2d1 | Set-VMNetworkAdapter -MacAddressSpoofing On
Get-VMProcessor -VMName g2wsip17046s2d1 |fl vmname,ExposeVirtualizationExtensions
Get-VMNetworkAdapter -VMName g2wsip17046s2d1 |fl VMName,MacAddressSpoofing

Set-VMProcessor -VMName g2wsip17046s2d2 -ExposeVirtualizationExtensions $true
Get-VMNetworkAdapter -VMName g2wsip17046s2d2 | Set-VMNetworkAdapter -MacAddressSpoofing On
Get-VMProcessor -VMName g2wsip17046s2d2 |fl vmname,ExposeVirtualizationExtensions
Get-VMNetworkAdapter -VMName g2wsip17046s2d2 |fl VMName,MacAddressSpoofing

Set-VMProcessor -VMName g2wsip17046s2d3 -ExposeVirtualizationExtensions $true
Get-VMNetworkAdapter -VMName g2wsip17046s2d3 | Set-VMNetworkAdapter -MacAddressSpoofing On
Get-VMProcessor -VMName g2wsip17046s2d3 |fl vmname,ExposeVirtualizationExtensions
Get-VMNetworkAdapter -VMName g2wsip17046s2d3 |fl VMName,MacAddressSpoofing

Set-VMProcessor -VMName g2wsip17046s2d4 -ExposeVirtualizationExtensions $true
Get-VMNetworkAdapter -VMName g2wsip17046s2d4 | Set-VMNetworkAdapter -MacAddressSpoofing On
Get-VMProcessor -VMName g2wsip17046s2d4 |fl vmname,ExposeVirtualizationExtensions
Get-VMNetworkAdapter -VMName g2wsip17046s2d4 |fl VMName,MacAddressSpoofing
各仮想マシンのOS上で実行します。
Set-Item WSMan:\localhost\Client\TrustedHosts "*"
1台のノードから、Enter-PSSessionで、サービスアカウントにローカル管理者権限を追加、Hyper-Vやフェールオーバークラスターなどの機能をインストールします。
$myServer1 = "g2wsip17046s2d1.sshzk2016.local"
$user1 = "sshzk2016\sashizaki"
$myServer2 = "g2wsip17046s2d2.sshzk2016.local"
$user2 = "sshzk2016\sashizaki"
$myServer3 = "g2wsip17046s2d3.sshzk2016.local"
$user3 = "sshzk2016\sashizaki"
$myServer4 = "g2wsip17046s2d4.sshzk2016.local"
$user4 = "sshzk2016\sashizaki"

Enter-PSSession -ComputerName $myServer1 -Credential $user1
Net localgroup Administrators sshzk2016\sa_s2dcluster /add
Install-WindowsFeature -Name "Data-Center-Bridging","Failover-Clustering","Hyper-V","RSAT-Clustering-PowerShell","Hyper-V-PowerShell" -IncludeManagementTools
shutdown -r -t 0
exit

Enter-PSSession -ComputerName $myServer2 -Credential $user2
Net localgroup Administrators sshzk2016\sa_s2dcluster /add
Install-WindowsFeature -Name "Data-Center-Bridging","Failover-Clustering","Hyper-V","RSAT-Clustering-PowerShell","Hyper-V-PowerShell" -IncludeManagementTools
shutdown -r -t 0
exit

Enter-PSSession -ComputerName $myServer3 -Credential $user3
Net localgroup Administrators sshzk2016\sa_s2dcluster /add
Install-WindowsFeature -Name "Data-Center-Bridging","Failover-Clustering","Hyper-V","RSAT-Clustering-PowerShell","Hyper-V-PowerShell" -IncludeManagementTools
shutdown -r -t 0
exit

Enter-PSSession -ComputerName $myServer4 -Credential $user4
Net localgroup Administrators sshzk2016\sa_s2dcluster /add
Install-WindowsFeature -Name "Data-Center-Bridging","Failover-Clustering","Hyper-V","RSAT-Clustering-PowerShell","Hyper-V-PowerShell" -IncludeManagementTools
shutdown -r -t 0
exit
以上で、フェールオーバークラスターを組むための準備が完了です。
Test-Cluster -node $myServer1,$myServer2,$myServer3,$myServer4 -include "Storage Spaces Direct",Inventory,Network,"System Configuration"
を実行します。

New-Cluster -name s2dcluster04 -node $myServer1,$myServer2,$myServer3,$myServer4 -noStorage -static 192.168.3.14
でフェールオーバークラスターを構成します。


Windows Server Insider Preview Build 17046ではクラスターアカウント(コンピューターアカウント)の作成とともにクラスターアカウントをDNSに動的登録してくれます。この挙動は、Windows Server 2016の挙動に戻りました~

でファイル監視をフェールオーバークラスターに設定しておきます。
※ファイル監視であれば、本来、SOFSなどの冗長構成を持たせておくのがベストです。フェールオーバークラスターには、クラウド監視も使えます。

Get-Cluster -Name s2dcluster04
で、フェールオーバークラスターが動作しているか確認しておきます。


フェールオーバークラスターが動作しているので
icm (Get-Cluster -Name s2dcluster04 | Get-ClusterNode) {
Update-StorageProviderCache
Get-StoragePool | ? IsPrimordial -eq $false | Set-StoragePool -IsReadOnly:$false -ErrorAction SilentlyContinue
Get-StoragePool | ? IsPrimordial -eq $false | Get-VirtualDisk | Remove-VirtualDisk -Confirm:$false -ErrorAction SilentlyContinue
Get-StoragePool | ? IsPrimordial -eq $false | Remove-StoragePool -Confirm:$false -ErrorAction SilentlyContinue
Get-PhysicalDisk | Reset-PhysicalDisk -ErrorAction SilentlyContinue
Get-Disk | ? Number -ne $null | ? IsBoot -ne $true | ? IsSystem -ne $true | ? PartitionStyle -ne RAW | % {
$_ | Set-Disk -isoffline:$false
$_ | Set-Disk -isreadonly:$false
$_ | Clear-Disk -RemoveData -RemoveOEM -Confirm:$false
$_ | Set-Disk -isreadonly:$true
$_ | Set-Disk -isoffline:$true
}
Get-Disk |? Number -ne $null |? IsBoot -ne $true |? IsSystem -ne $true |? PartitionStyle -eq RAW | Group -NoElement -Property FriendlyName
} | Sort -Property PsComputerName,Count
でディスクのクリーンアップを行います。


Enable-ClusterStorageSpacesDirect
でS2Dを構成します。

New-Volume -FriendlyName "Volume1" -FileSystem CSVFS_ReFS -StoragePoolFriendlyName S2D* -Size 656GB -ResiliencySettingName Mirror
で、S2DにCSVを構成します。


あとは、仮想スイッチを作れば、仮想マシンを配置できるわけです。

Windows Server 2016 の Windows Update が不調の場合

Windows Server 2016 の Windows Update が不調となる状況をいくつかトラブルシュートしました。

最も手軽なのは、トラブルシューティングを用いる方法です。

Windows 10 - Windows Update に失敗する場合の対処法
は、Windows 10のものですが、Windows Server 2016でも同じツールが使えます。


上記でもダメな場合もあります。
Windows Update クライアントの情報をクリアにする手順は、タイムスタンプが2014年になっていますが、Windows 10とWindows Server 2016向けに加筆されており、今回非常に役立ちましたのでご紹介させていただきます。

気が付いたのは、手順がWindows Server 2016では変わっているところがあります。
Windows Update クライアントの情報をクリアにする手順に記載あるように、Windows Server 2016では、[Update Orchestrator] サービスを止める手順、bitsのジョブ削除手順が増えています。
※自分自身も不勉強でした。

今回は、これらの手順を参考に、cryptsvcも停止してcatroot2も念のためリネームする下記の手順として、いくつかのケースでWindows Server 2016 の Windows Update が正常となることを確認できました。
※一部、Windows Update クライアントの情報をクリアにする手順より転記しています。
 %ALLUSERSPROFILE% が C:\ProgramData となります。シンボリックリンクですね。


net stop usosvc
net stop wuauserv
net stop bits
net stop cryptsvc

ren %systemroot%\SoftwareDistribution SoftwareDistribution.old
ren %systemroot%\system32\catroot2 catroot2.old

del "%ALLUSERSPROFILE%\Microsoft\Network\Downloader\qmgr*.dat"

net start cryptsvc
net start bits
net start wuauserv
net start usosvc

usoclient startscan

環境によっては、10分以上待ってからでないと、ダウンロードが開始されない場合もありましたこと申し添えます。

あとは、必要に応じて、
WINDOWS10定義の更新エラー 0X80070643を直す方法。
にあるようなsfcコマンド、dismコマンドの実行も検討ください。


追伸

今回は、Windows Defenderの定義ファイルダウンロードで詰まることも多かったです。
ヒント: コマンド ラインで Windows Defender を実行 (自動化) する
にある下記のコマンドで定義ファイルをリセットできます。
C:\Program File\Windows Defender\MpCmdRun.exe -RemoveDefinitions -All

あと、下記で最新版の定義ファイルをダウンロードできますね。
Definition updates for Windows Defender Antivirus and other Microsoft antimalware

2017年12月10日日曜日

System Center User Group Japan 第18回 勉強会の資料「Project Honolulu 見てみましょう」を公開します。

System Center User Group Japan 第18回 勉強会の資料「Project Honolulu 見てみましょう」を公開します。
Twitterでもリンクを公開しております→「Project Honolulu 見てみましょう
※ただし、デモンストレーション画面は含まれておりません。

2017年12月3日日曜日

Project Honolulu 1711 Updateが出てます。

1711 update to Project “Honolulu” Technical Preview is now available!

早速入れてみましたが、認証後に全サーバーへ接続することがなくなりました。これは上記にも書かれており、機能削除ということです。


あとは、RDPもできて、PowerShellも実行可能と、新機能は上記記事を見ていただきたいです。


全貌にどこまで迫れるか、System Center User Group Japan 第18回 勉強会でお話しします。

2017年11月26日日曜日

Project Honolulu 1711 Build 01003を入れてみた、S2Dも管理できてる

Windows Server Insider Preiew 17035と同タイミングでProject Honolulu 1711 Build 01003もリリース済み。
Announcing Windows Server Insider Preview Build 17035
に新機能、既知の問題点がリストされていますので、必要に応じてごらんください。
なお本リリースより、Windows 10も管理対象になってます。

Project Honolulu自体も、Insider Previewの対象です。Insider Previewに登録してしまえばダウンロードできます。
Windows Server 2016以降であれば、事前準備しておくソフトウェアはありません。このことは、Supported operating systemsにて確認できます。

ということで、簡単にインストールのステップを追ってみます。

ライセンス条項の肯定します。


ここは、デスクトップにアイコンを作成するオプションを追加しました。


既定値は443ですが、なんとなくよりHighポートを選択。
SSL証明書(TLS証明書じゃなくて?!)も選べるようになっています。今回は自己署名証明書にしました。


ということでインストールもササっとおわります。


実際にサーバーを登録してみた画面は、下記の通り。停止しているサーバーもありすべてオンラインではありませんが、S2Dも追加できてます~


Azure Stack Development Kit 1.0.06を登録してマーケットプレイスとつなげた

日本語版だと手順が分かりにくかったため、英語版をご覧いただくのが手っ取り早いですね。

Get up and running with PowerShell in Azure Stackに沿って進めます。
Set up PowerShell for Azure Active Directory-based deploymentsを実行します。


全体管理者としてAzure ADに登録したアカウントを使用しました(以降、全体管理者アカウントと呼称)。


Set up PowerShell for Azure Active Directory-based deploymentsを実行し終えました。特に問題なし。


Test the connectivityを実行して、接続を確認します。問題なく成功しました。


ここからRegister Azure Stack resource provider in Azureに沿って進めます。
Get Azure subscriptionを実行します。
まず全体管理者アカウントを使っています。


(画面は後述ですが)サブスクリプションIDが表示されないので、Azureサブスクリプションを登録したMicrosoftアカウントでやり直してみます。


PowerShellのウィンドウで赤いエラー表示が全体管理者アカウント、下がMicrosoftアカウントです。Microsoftアカウントを使ったほうが良いですね。
Account requirementsでもMicrosoftアカウントが使える旨、記載あります!


Azure Stack PowerShellを入れていなかったので、Install PowerShell for Azure Stackに沿ってインストールしておきます。
今回はAzure ADを用いるモデルのため、Install PowerShell in a connected scenario沿えばOK。


登録には、githubよりAzure Stack toolsをダウンロードする必要があります。Download Azure Stack tools from GitHubに沿って進めます。


いよいよAzure Stack Development Kit 1.0.06を登録します。
Register Azure Stack with Azureの5から再開します。
RegisterWithAzure.psm1 は、下記のフォルダーに展開されています。


もう一度、Add-Azure-RmAccoutを実行しましたが、Microsoftアカウントでないと、サブスクリプションIDが取得できませんね。


RegisterWithAzure.psm1をc:\tempにコピーしてインポートしています。あとで見返したところこのコピーは不要でした。。。


$AzureContextに何が入っているか見てみました。


$CloudAdminCred = Get-Credential -UserName AZURESTACK\CloudAdmin -Message "Enter the cloud domain credentials to access the privileged endpoint"
を実行です。AzureStack\cloudadminのパスワードを入力します。


Add-AzsRegistration `
-CloudAdminCredential $CloudAdminCred `
-AzureSubscriptionId $AzureContext.Subscription.Id `
-AzureDirectoryTenantName $AzureContext.Tenant.TenantId `
-PrivilegedEndpoint AzS-ERCS01 `
-BillingModel Development
を実行し、登録開始。


何事もなければ、しばらくすると完了します。


登録できたのて、Verify the registrationに沿ってマーケットプレイスからイメージをダウンロードしてみます。こちらもMicrosoftアカウント全体管理者アカウントを使っています。


ということで、マーケットプレイスとの接続も無事確認完了。
これで、デプロイしてみれば、Azure Stack IaaSとして使えるようになるということです。