Cloud OS MVP Roadshow 2014 年 5 月 with System Center User Group Japan
現場のプロフェッショナルが語る「今だから知りたいマイクロソフト最新製品事情とサーバー・クライアント管理の基礎」で
[セッション 1]
Linux と System Center Operations Manager.
をお話させていただきました。
遅ればせながら、セッション資料を公開します。
[slideshare id=35094158&doc=20140524linuxandscom-140525060121-phpapp02]
2014年5月26日月曜日
2014年5月24日土曜日
sshキーによるSystem Center Operations Managerエージェントの導入
UNIX/LinuxにSystem Center Operations Managerエージェントの導入するやり方として、sshキーを使う方法があるので試してみます。
CentOS 6.5で試してみます。
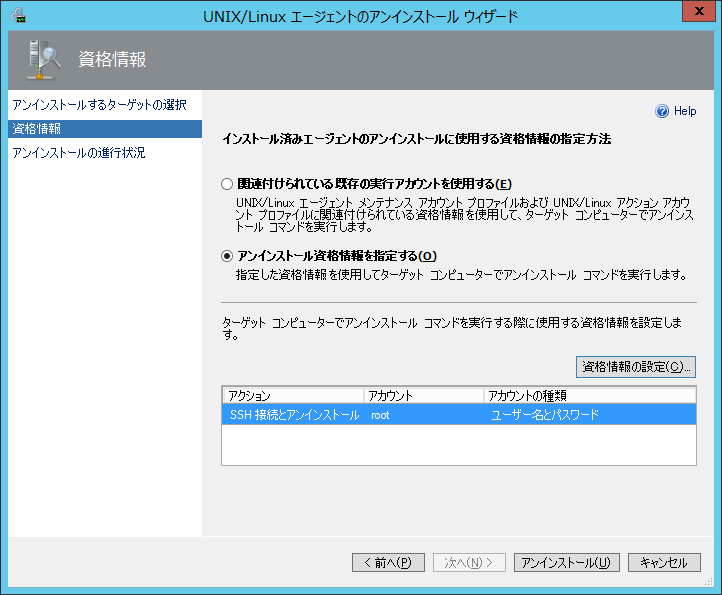
とりあえず、すでに導入済みのOMエージェントを一旦アンインストールします。


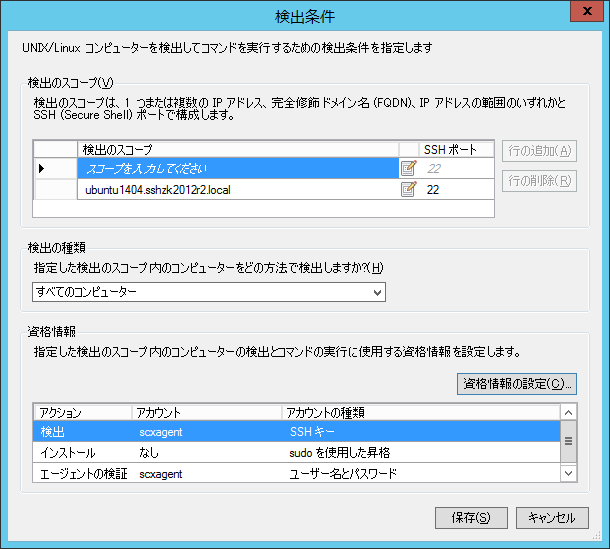
sshキーを指定してOMエージェントを導入してみます。


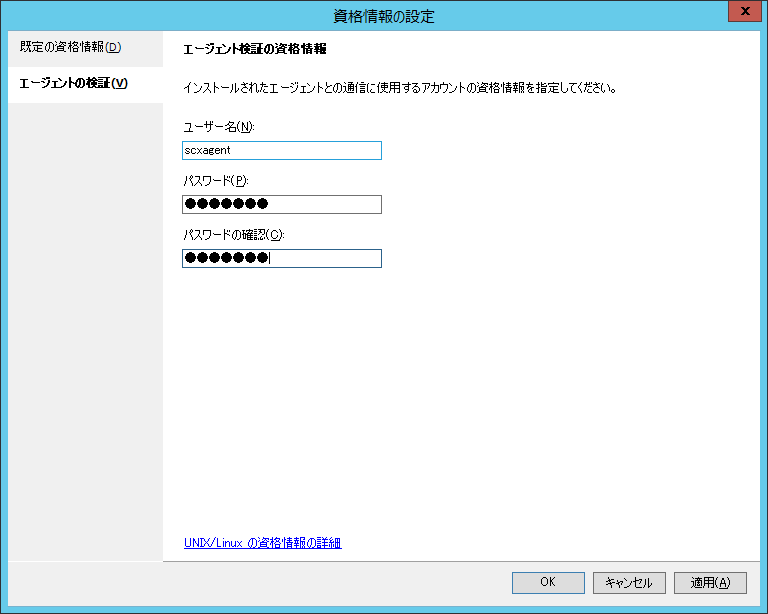
監視用のアクションアカウント"scxagent"と、sshキーを指定します。

sudoを選びます。

通信用のアカウントとしては、監視用のアクションアカウント"scxagent"を指定します(パスワードも設定しておきます)。

保存して、ウィザードに戻ります。

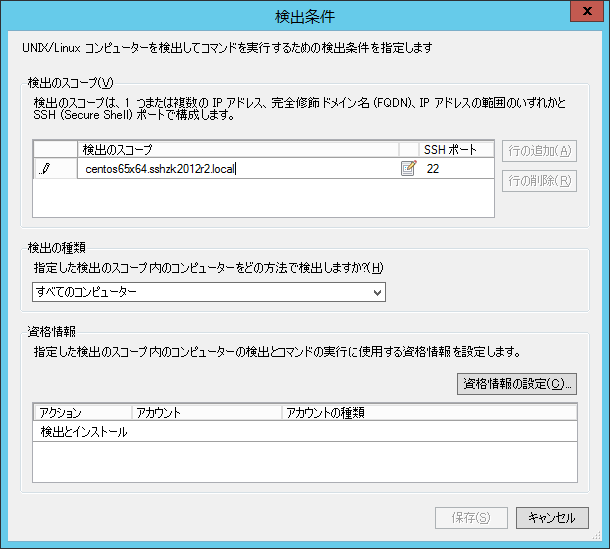
ターゲットリソースを指定して、[検出]ボタンを押します。

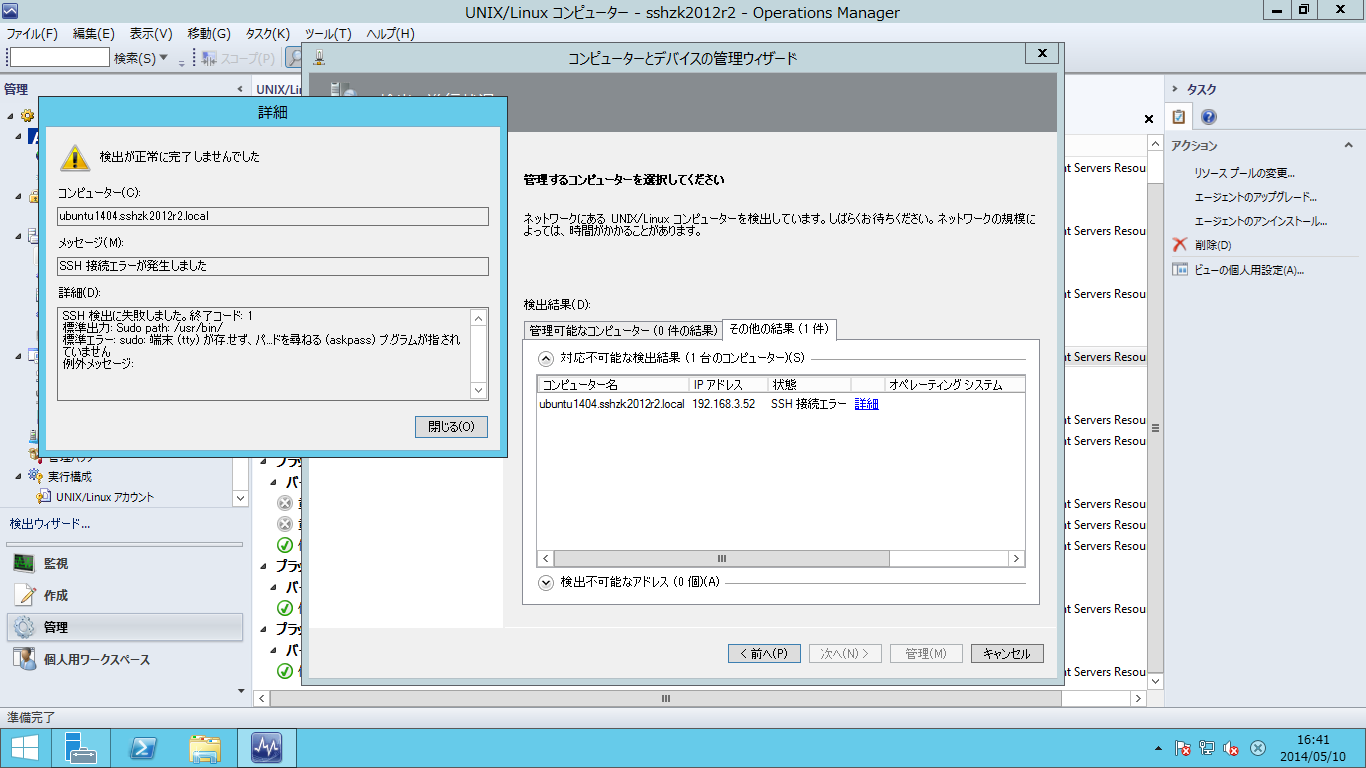
エラー発生。。。

rootアカウントで導入してみます。


rootアカウントで導入するように設定します。

通信用のアカウントとしては、監視用のアクションアカウント"scxagent"を指定します(パスワードも設定しておきます)。

保存して、ウィザードに戻ります。

ターゲットリソースを指定して、[検出]ボタンを押します。

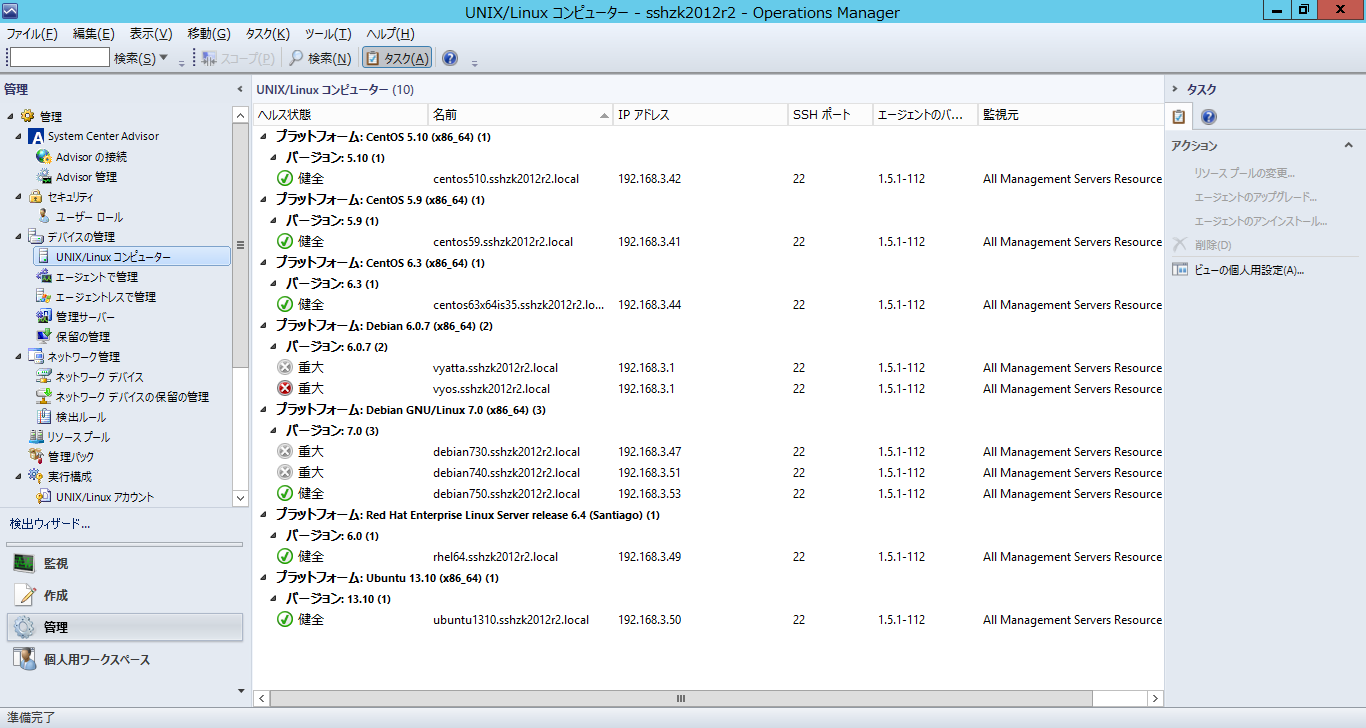
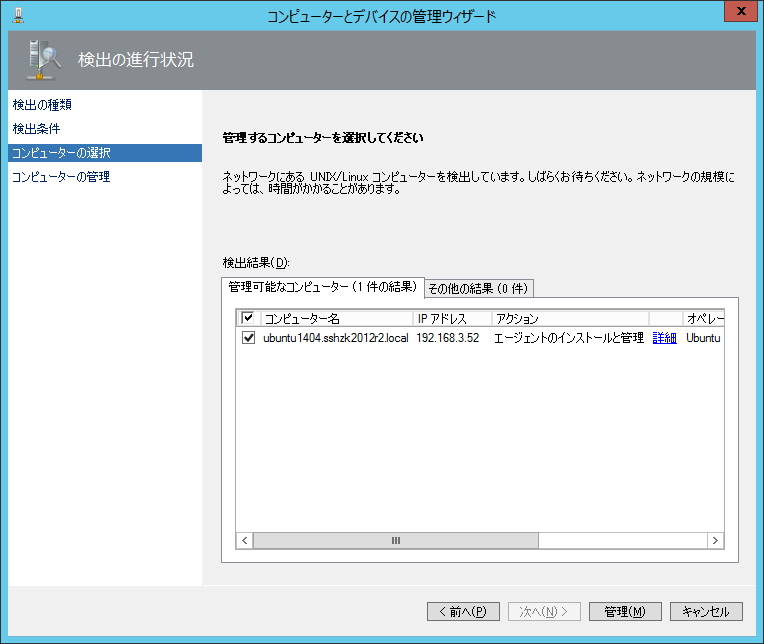
今度はうまく検出できました。

チェックボックスをチェックして、[インストール]ボタンを押します。

無事にインストール完了。

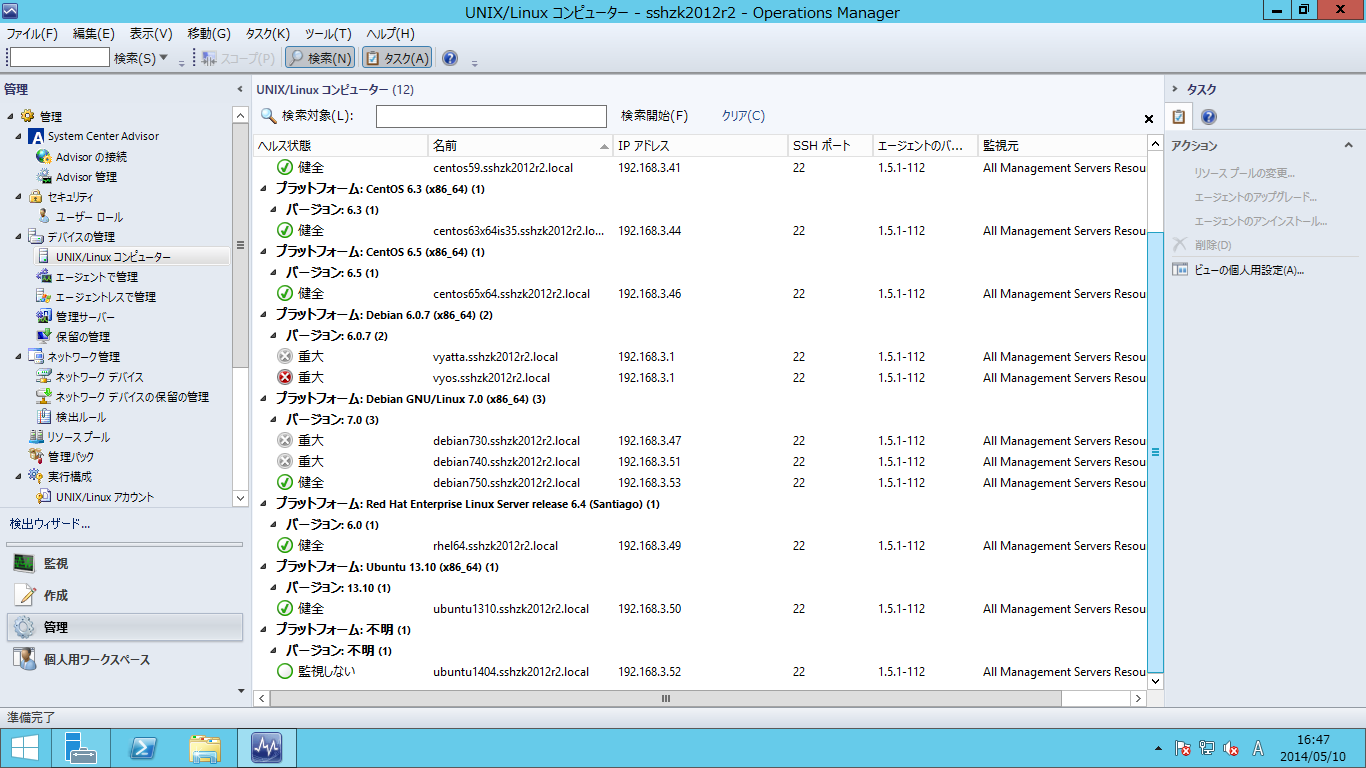
一瞬、プラットフォーム不明、バージョン不明になってますが、時間が解決する(監視用のアクションアカウントはOMで設定済みですし)と思われるので、放置します。

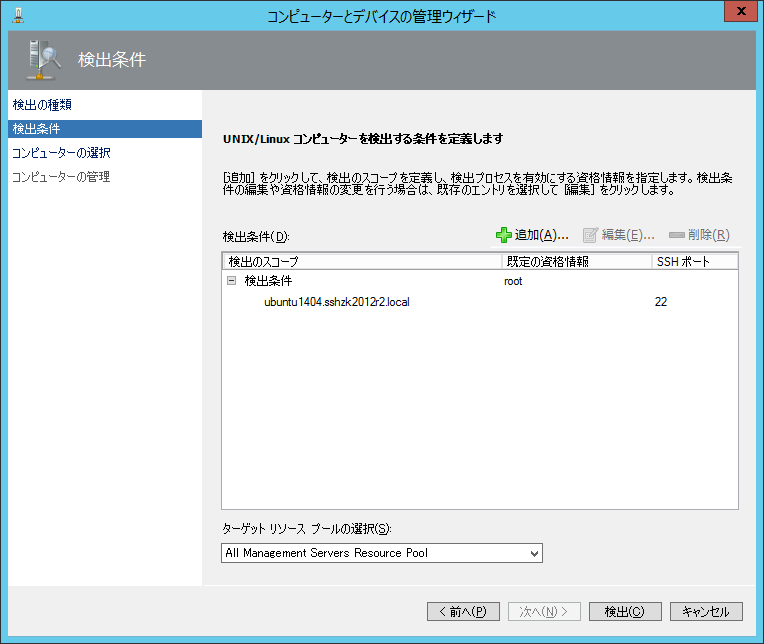
切り分けのため、最近リリースされたUbuntu 14.04にsshキーで、System Center Operations Managerエージェントの導入してみます。
(ウィザードは、散々説明しているので端折ります~)


監視用のアクションアカウント"scxagent"と、"このアカウントには特権アクセスがありません"を指定します。

sudoで昇格して導入することを確認します。

保存を押してウィザードに戻ります。
ターゲットリソースを指定して、[検出]ボタンを押します。

メッセージが先ほどと異なりますが、やっぱりエラー発生。。。

ということで、Ubuntu 14.04もrootアカウントで導入してみます(途中の解説は省略)。


rootアカウントで導入するように設定します。

通信用のアカウントとしては、監視用のアクションアカウント”scxagent”を指定します(パスワードも設定しておきます)。

保存して、ウィザードに戻ります。

ターゲットリソースを指定して、[検出]ボタンを押します。

うまく検出できました。

ここで、再度立ち戻りsudoでうまくいかないか念のため確認してみることにしました。


やっぱり、エラーが発生して失敗しました。。。

再度、rootアカウントで導入し直し、ウィザードを下記の画面まで進めます。
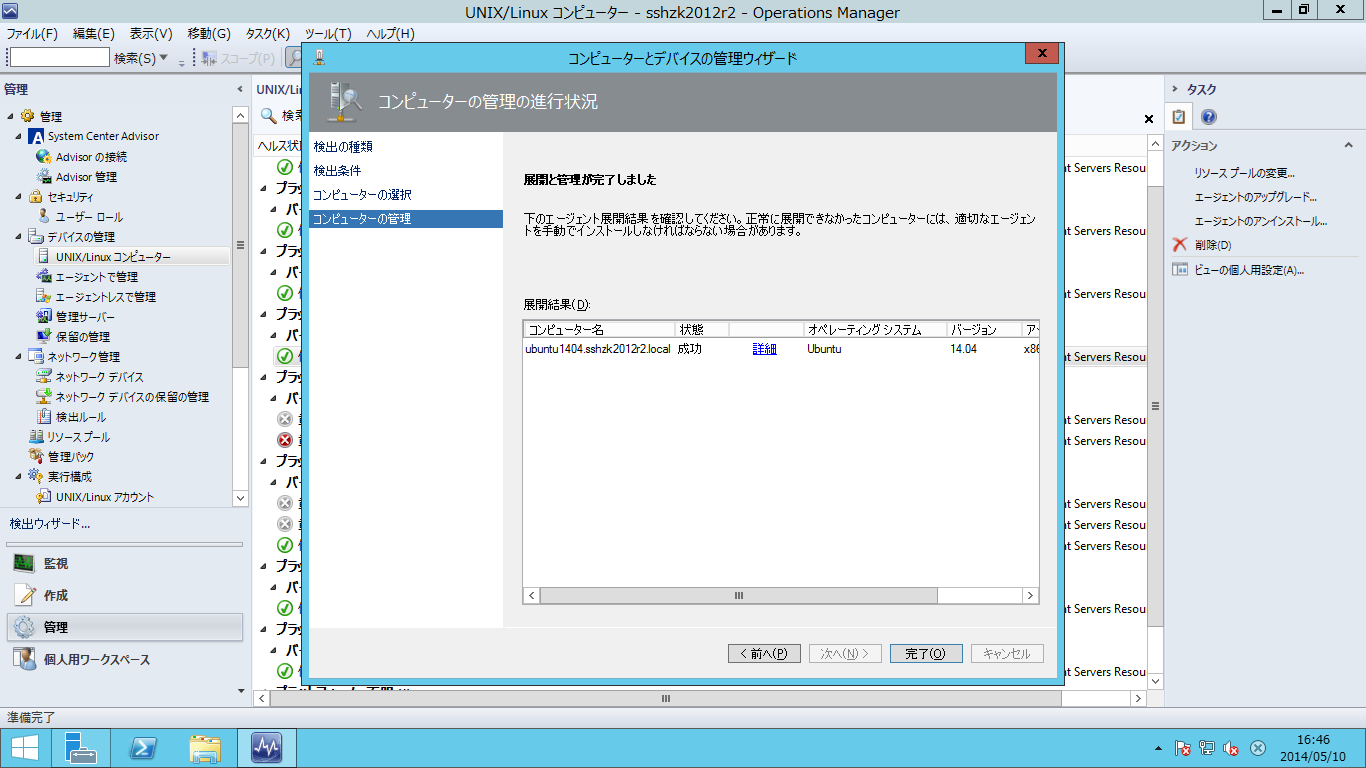
[管理]ボタンを押して、OMエージェントを導入します。


OMエージェントの導入が成功しました。

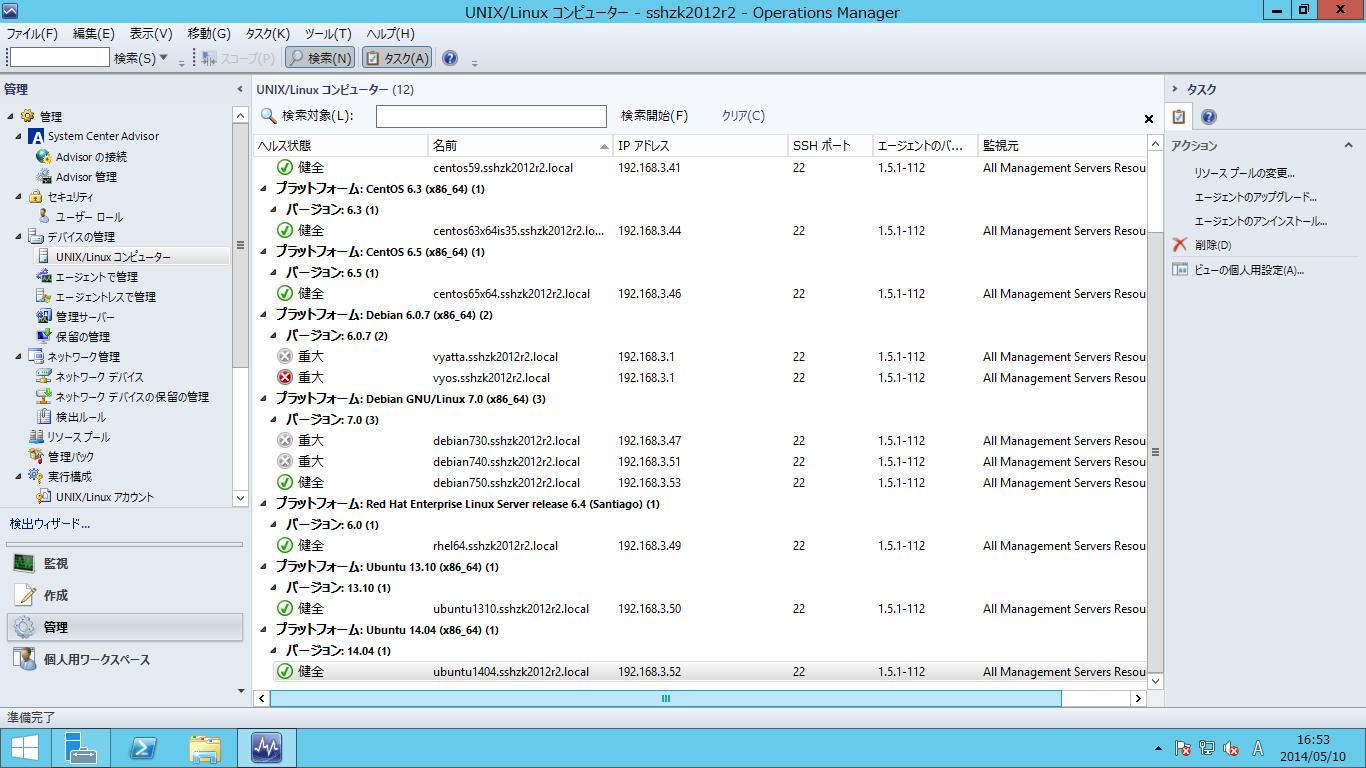
Ubuntu 14.04も一瞬、プラットフォーム不明、バージョン不明になってますが、

(監視用のアクションアカウントであるscxagentをUbunt 14.04に作成済みでしたので)5分ほど待つと、Ubuntu 14.04として監視できるようになりました。

私のやり方がまずいのか、仕様なのか、バグなのか不明ですが、sshキーを使ってOMエージェントを導入する際には、rootアカウントを指定する必要があるようです。
今後も折に触れて確認し、何か変更があればお伝えしようと思います。
CentOS 6.5で試してみます。
とりあえず、すでに導入済みのOMエージェントを一旦アンインストールします。


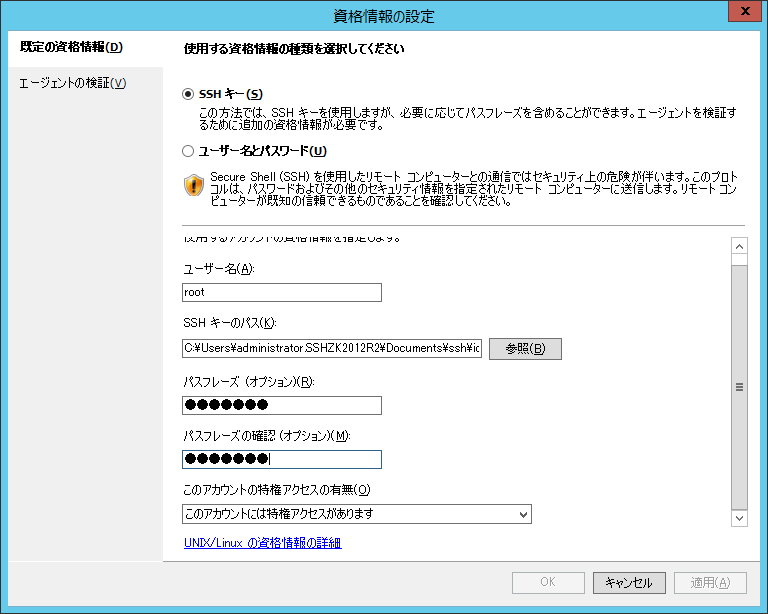
sshキーを指定してOMエージェントを導入してみます。


監視用のアクションアカウント"scxagent"と、sshキーを指定します。

sudoを選びます。

通信用のアカウントとしては、監視用のアクションアカウント"scxagent"を指定します(パスワードも設定しておきます)。

保存して、ウィザードに戻ります。

ターゲットリソースを指定して、[検出]ボタンを押します。

エラー発生。。。

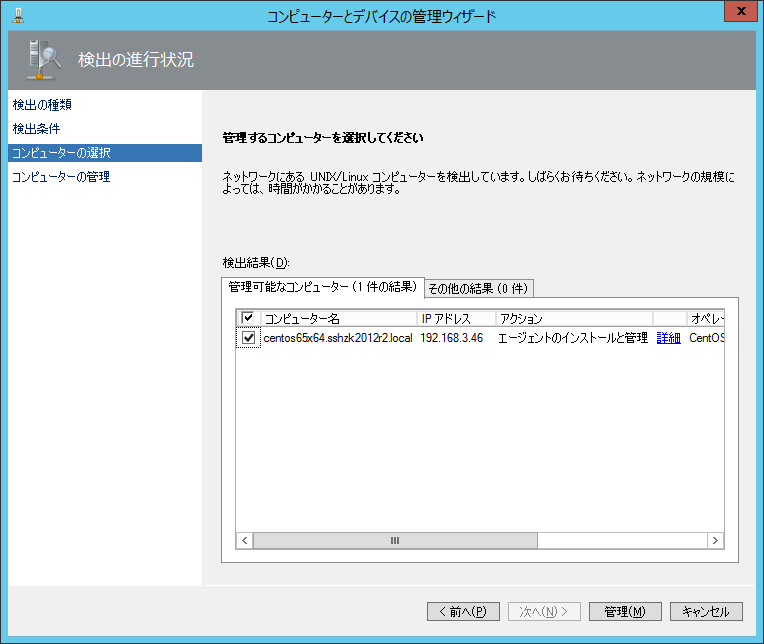
rootアカウントで導入してみます。


rootアカウントで導入するように設定します。

通信用のアカウントとしては、監視用のアクションアカウント"scxagent"を指定します(パスワードも設定しておきます)。
保存して、ウィザードに戻ります。

ターゲットリソースを指定して、[検出]ボタンを押します。

今度はうまく検出できました。

チェックボックスをチェックして、[インストール]ボタンを押します。
無事にインストール完了。
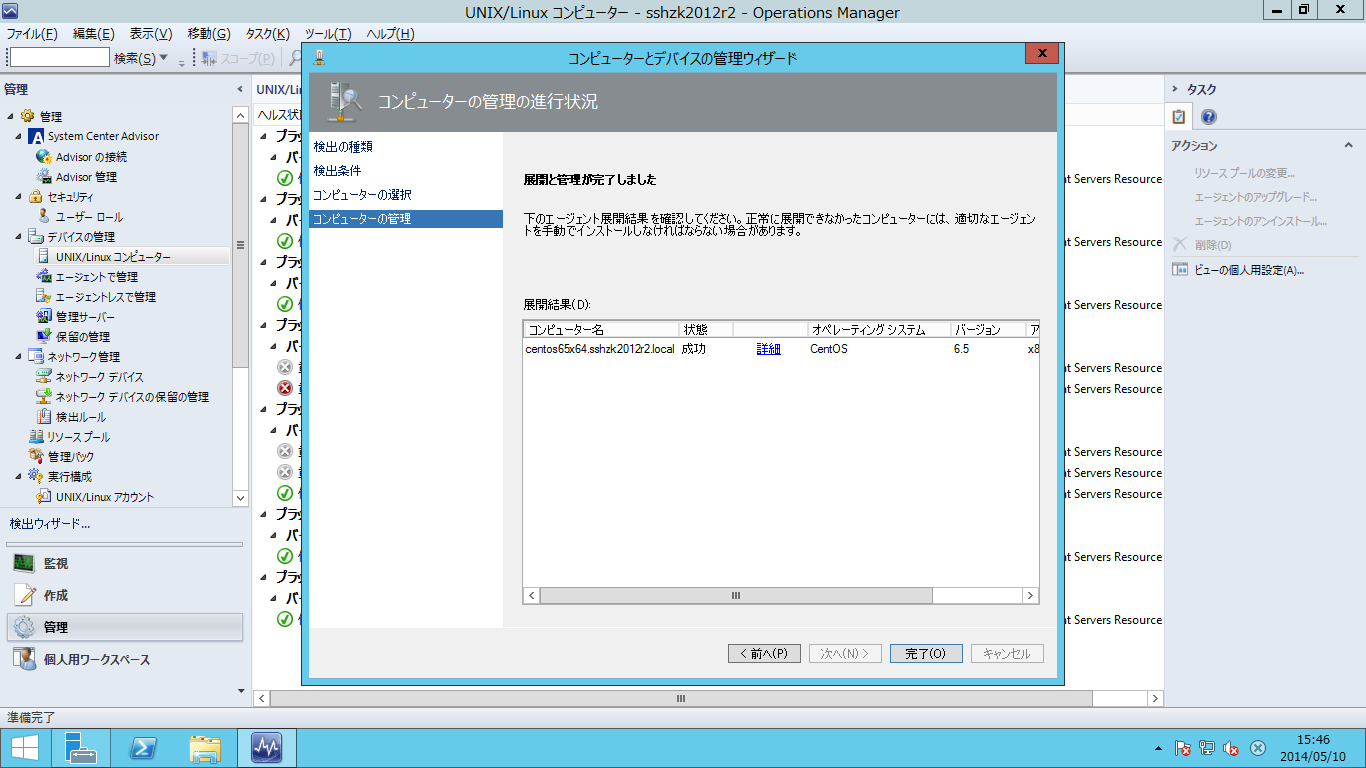
一瞬、プラットフォーム不明、バージョン不明になってますが、時間が解決する(監視用のアクションアカウントはOMで設定済みですし)と思われるので、放置します。

切り分けのため、最近リリースされたUbuntu 14.04にsshキーで、System Center Operations Managerエージェントの導入してみます。
(ウィザードは、散々説明しているので端折ります~)


監視用のアクションアカウント"scxagent"と、"このアカウントには特権アクセスがありません"を指定します。

sudoで昇格して導入することを確認します。

保存を押してウィザードに戻ります。
ターゲットリソースを指定して、[検出]ボタンを押します。

メッセージが先ほどと異なりますが、やっぱりエラー発生。。。

ということで、Ubuntu 14.04もrootアカウントで導入してみます(途中の解説は省略)。


rootアカウントで導入するように設定します。
通信用のアカウントとしては、監視用のアクションアカウント”scxagent”を指定します(パスワードも設定しておきます)。

保存して、ウィザードに戻ります。

ターゲットリソースを指定して、[検出]ボタンを押します。
うまく検出できました。
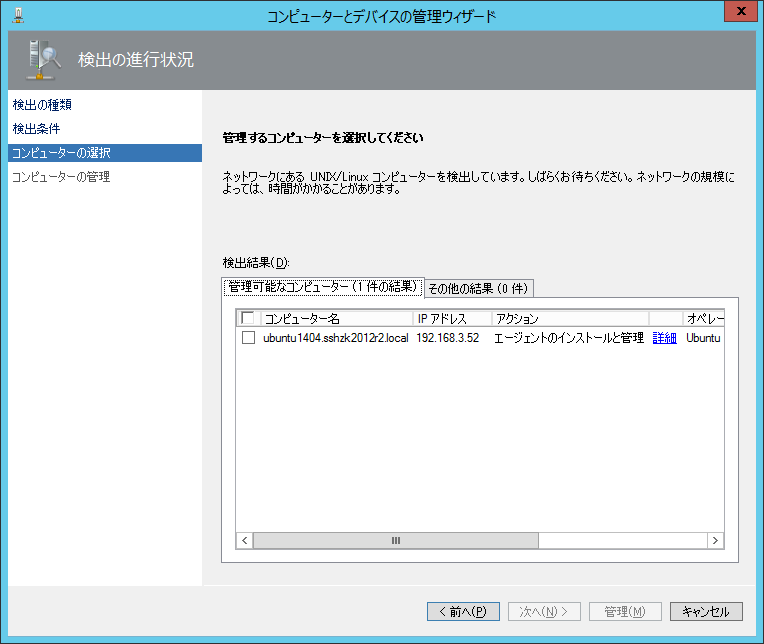
ここで、再度立ち戻りsudoでうまくいかないか念のため確認してみることにしました。


やっぱり、エラーが発生して失敗しました。。。
再度、rootアカウントで導入し直し、ウィザードを下記の画面まで進めます。
[管理]ボタンを押して、OMエージェントを導入します。

OMエージェントの導入が成功しました。
Ubuntu 14.04も一瞬、プラットフォーム不明、バージョン不明になってますが、
(監視用のアクションアカウントであるscxagentをUbunt 14.04に作成済みでしたので)5分ほど待つと、Ubuntu 14.04として監視できるようになりました。
私のやり方がまずいのか、仕様なのか、バグなのか不明ですが、sshキーを使ってOMエージェントを導入する際には、rootアカウントを指定する必要があるようです。
今後も折に触れて確認し、何か変更があればお伝えしようと思います。
登録:
コメント (Atom)