SCUGJ 第10回勉強会 第3セッション「ノンコーディングでActive Directoryを管理してみる」のセッション資料を公開致します。
[slideshare id=40711777&w=476&h=400&sc=no]
なお、冒頭数分間、マイクが外れておりお聞き辛かったと思います。申し訳ありませんでした。
セッションのデモンストレーションでは、Azure上に構築したSystem Center 2012 R2 Orchestratorをご覧頂きました。
System CenterもAzureでサポートされています。
すでにAzure IaaSでSystem Centerなる記事を見つけて思ったことにも書きましたが、Microsoft Azure 仮想マシン用のマイクロソフト サーバー ソフトウェアのサポート http://support.microsoft.com/kb/2721672として、サポート情報もありますので、チェックしてみてはいかがでしょうか~
2014年10月26日日曜日
2014年10月19日日曜日
Windows Server 2003 ADドメインにWindows Server 2012 R2ドメインコントローラーを追加すると60日後にログオンできなくなる
Windows Server 2003からの移行セミナーでアナウンスがあったそうなのですが、見事にhitしてえらい目に遭ってしまいました。私の場合、すでにWindows Server 2003のドメインコントローラーは降格していたのですが、見事に現象通りでした。
60日後というと、Windows Server 2003 ADドメインにWindows Server 2012 R2ドメインコントローラーを追加後、コンピューターアカウントのパスワード変更を2回行ったタイミングになります(既定では30日に一度コンピューターアカウントのパスワードが変更されます)。
これが起きると、コンソールからのログオン、リモートデスクトップからのログオン、リモートからのshutdown、リモートからのイベントビューアー参照等、ほとんどのリモート操作が不可能になります。
他ドメインコントローラーのイベントビューアーでも、問題が発生したドメインコントローラーのコンピューター名で、Microsoft-Windows-Security-Kerberos の ID 4 のイベントが記録されることがあります。
こうなってしまいますと、
後に、電源再投入して、再起動するしかなくなります。
これはすでに下記のサポート情報で解決策が提示されています。
Windows Server 2012 R2 と Windows Server 2003 の混在環境でのコンピューター アカウントのパスワードを変更した後にログオンできない http://support.microsoft.com/kb/2989971
※この修正プログラムは、Windows Updateでも配布されています。
Windows Server 2003からの移行で、 Windows Server 2012 R2にActive Directoryドメイン サービスをインストールしたタイミング(ドメインコントローラーへの昇格前)で、上記リンクからダウンロードできる修正プログラムを適用していください。
すでに、Windows Server 2003からの移行で、 Windows Server 2012 R2をドメインコントローラーへ昇格した場合は、
を行います。
改めて修正プログラムの適用条件を確認すると、下記の通りということでした。
現象の詳細については、サポートチームのブログにも記事があるそうなので、そちらも参考にしてください。
Windows Server 2012 R2 をドメイン コントローラーとして Windows Server 2003 で構成された Active Directory ドメインに追加後、ログオン障害が発生する http://blogs.technet.com/b/jpntsblog/archive/2014/10/16/windows-server-2012-r2-windows-server-2003.aspx
60日後というと、Windows Server 2003 ADドメインにWindows Server 2012 R2ドメインコントローラーを追加後、コンピューターアカウントのパスワード変更を2回行ったタイミングになります(既定では30日に一度コンピューターアカウントのパスワードが変更されます)。
これが起きると、コンソールからのログオン、リモートデスクトップからのログオン、リモートからのshutdown、リモートからのイベントビューアー参照等、ほとんどのリモート操作が不可能になります。
他ドメインコントローラーのイベントビューアーでも、問題が発生したドメインコントローラーのコンピューター名で、Microsoft-Windows-Security-Kerberos の ID 4 のイベントが記録されることがあります。
こうなってしまいますと、
- 物理サーバーであれば、電源ボタンをちょっと押しでOSのシャットダウンを実行する(電源ボタンの長押しはくれぐれもやらないでください。最悪の場合OSが起動しなくなることも想定されます)。
- 仮想マシンであれば、ハイパーバイザー側の管理ツールからシャットダウンを実行する。
後に、電源再投入して、再起動するしかなくなります。
これはすでに下記のサポート情報で解決策が提示されています。
Windows Server 2012 R2 と Windows Server 2003 の混在環境でのコンピューター アカウントのパスワードを変更した後にログオンできない http://support.microsoft.com/kb/2989971
※この修正プログラムは、Windows Updateでも配布されています。
Windows Server 2003からの移行で、 Windows Server 2012 R2にActive Directoryドメイン サービスをインストールしたタイミング(ドメインコントローラーへの昇格前)で、上記リンクからダウンロードできる修正プログラムを適用していください。
すでに、Windows Server 2003からの移行で、 Windows Server 2012 R2をドメインコントローラーへ昇格した場合は、
- Windows Server 2012 R2ドメインコントローラーに修正プログラムを適用していください。
- その後、Windows Vista以降のクライアントOS、Windows Server 2008以降のサーバーOSは、必ず再起動を行います。
を行います。
改めて修正プログラムの適用条件を確認すると、下記の通りということでした。
- Windows Server 2012 R2 Updateが適用されていること。
http://support.microsoft.com/kb/2919355 - Windows Server 2012 R2にActive Directoryドメイン サービスをインストールされていること。
ドメインコントローラーに昇格しているか否かは関係ないです。
現象の詳細については、サポートチームのブログにも記事があるそうなので、そちらも参考にしてください。
Windows Server 2012 R2 をドメイン コントローラーとして Windows Server 2003 で構成された Active Directory ドメインに追加後、ログオン障害が発生する http://blogs.technet.com/b/jpntsblog/archive/2014/10/16/windows-server-2012-r2-windows-server-2003.aspx
2014年10月14日火曜日
System Center Technical Preview Operations Managerをインストールしてみる
注)開発途中の製品ですので、あくまでも2014年10月時点の情報となります。今後開発が進むに従い、本記事の内容と差異が発生するはずです。これをもって、次期System Center がこうなると判断するのは早計ですので、ご注意ください。
System Center Technical Previewですが、開発途中ということもあり、システム要件がはっきりしていません(単に自分が探せていないだけかもしれませんが)。System Center Technical Previewのシステム要件を確認するためのトライアンドエラー第3回目は、Operations Managerをインストールしていきます。
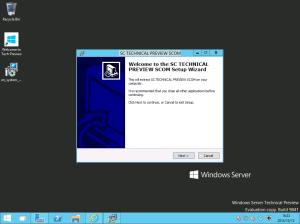
ダウンロードしてきたファイルを実行します。
[Next]ボタンを押します。
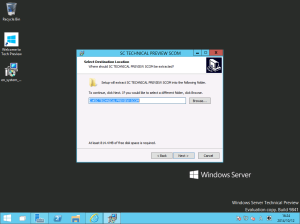
展開先を確認し、[Next]ボタンを押します。
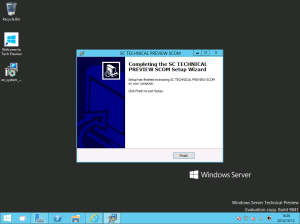
[Extract]ボタンを押して、ファイルを展開します。

展開が完了したら、[Finish]ボタンを押して終了します。
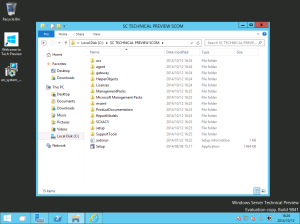
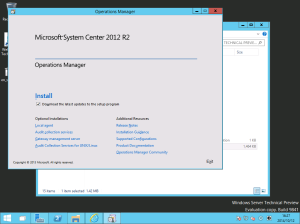
展開先のフォルダーにあるセットアッププログラムを実行します。
[Download latest updates to the setup program]をクリックします。

[Install]をクリックします(2014年10月時点では特にセットアップ用の更新プログラムは出ていないようです)。
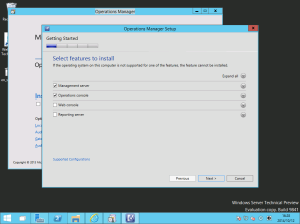
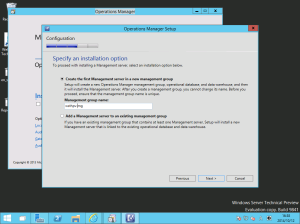
[Management server]と[Operaions console]をチェックし、[Next]ボタンを押します。

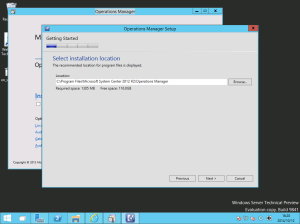
インストールパスは、デフォルトのままとするので、[Next]ボタンを押します。
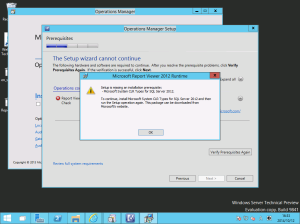
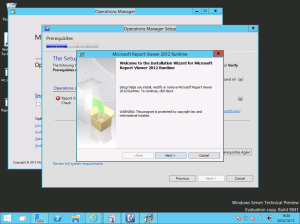
やはりレポートビューアーが必要でした。リンク先をクリックしてみてバージョンを確認します。
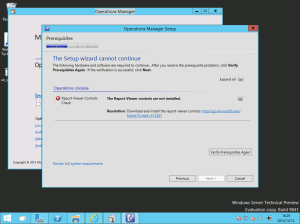
System Center Technical Preview Operaions Managerは、Report Viewer 2012を使います(製品版は変わるかもしれませんね)。Windows Server Technical Previewに合わせて、
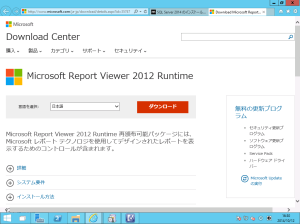
英語版を選択しダウンロードします。
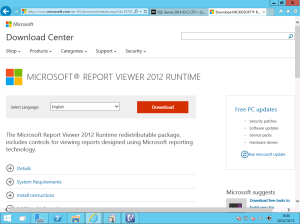
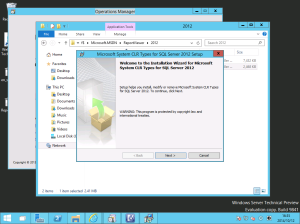
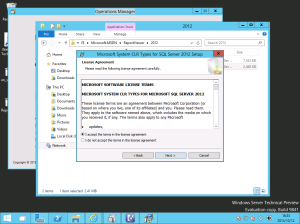
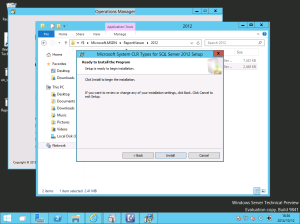
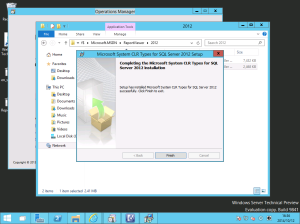
インストールしますが、やはりMicrosoft System CLR Types for Microsoft SQL Server 2012も必要なので、
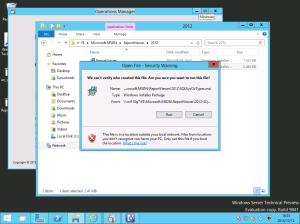
これもインストールします。
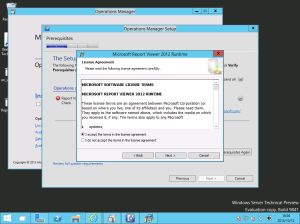
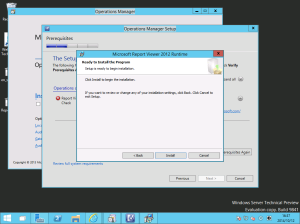
Report Viewer 2012をインストールします。

もう一度、インストール要件の事前確認を行います。もんだいないので、[Next]ボタンを押します。

マネジメントグループ名を設定し、[Next]ボタンを押します。
ライセンス条項を受諾するため、チェックボックスをチェックし、[Next]ボタンを押します。

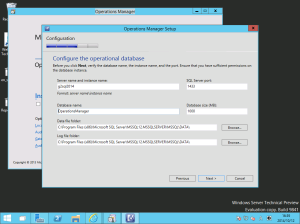
SQL Serverへの接続情報、データベース名(デフォルトのままとしました)を指定し、[Next]ボタンを押します。
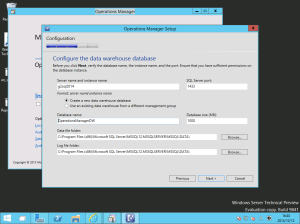
SQL Serverへの接続情報、データウェアハウスのデータベース名(デフォルトのままとしました)を指定し、[Next]ボタンを押します。
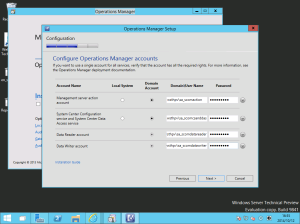
すべてのアカウントをサービスアカウント(ドメインアカウント)で置き換えます。
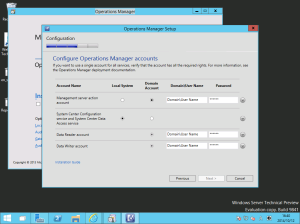
How to Install the First Management Server in a Management Groupの15番にしたがって、サービスアカウントを作成します。
Operations Manager Accountsも参考にできます。
サービスアカウントもどういう権限が必要かは、Security ConsiderationsのService Accounts配下を確認します。System Center Configuration service and System Center Data Access service accountは、OMのローカル管理者権限が必要である旨も、ここに書かれています。
Operations Manager Accountsも参考になります。
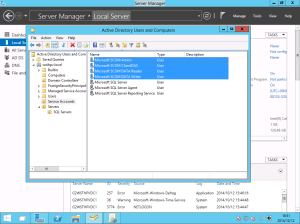
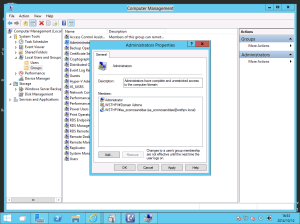
System Center Configuration service and System Center Data Access service accountをOperations ManagerのManagement Serverのローカル管理者グループに追加します。
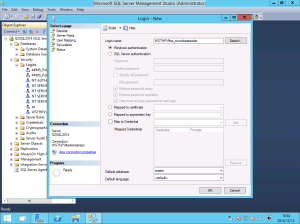
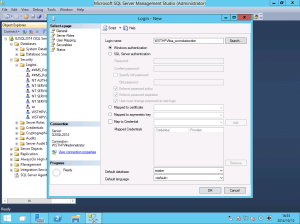
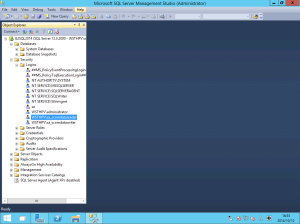
Data Warehouse Write accountとData Reader accountは、Deploying System Center 2012 – Operations ManagerのRequired Accountsの表にある”Note”部分を確認すると良いです。ということで、SQL Server 2014でログイン権限を付与します。
サービスアカウントを設定したら、[Next]ボタンを押します。
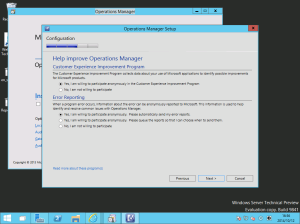
CEIPとエラー報告は、それぞれYesを選択し、[Next]ボタンを押します。
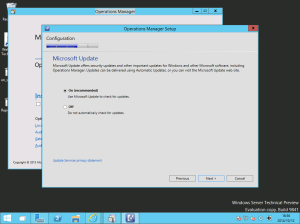
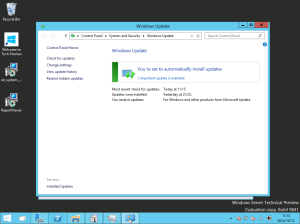
Microsoft Updateは[On]を選択して有効化し、[Next]ボタンを押します。
構成内容を確認します。
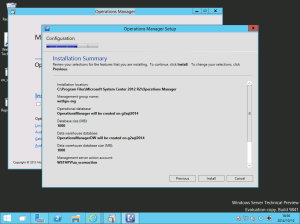
構成内容を確認したら、[Install]ボタンを押してインストールを開始します。
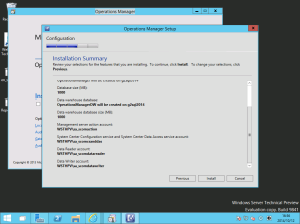
※インストールに当たり、management serverおよびSQL Server 2014の動的メモリは最低メモリを3072MBにしてみました。この値未満だとインストールが非常に遅くなります。推測ですが、最低メモリはmanagement serverおよびSQL Server 2014で、それあぞれ4GB以上にしておくのが望ましいのでしょうね。
インストール中。

ライセンスアクティベーションの警告が出ていますが、PowerShellコマンドレットでないとできないのと評価版としてつかうので、このままにしておきます。
Operations Consoleが起動しないようにチェックを外し、

Microsoft Updateが起動するようにチェックを入れて、[Close]ボタンを押します。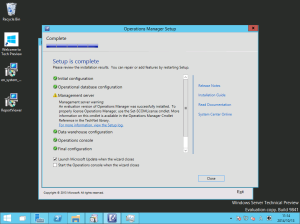
やはり、System Center Technical Preview OM用の更新プログラムは2014年10月時点ではありませんでした。
最後にスタートメニューの問題がないことを確認します。OMは問題ないようです。
System Center Technical Previewですが、開発途中ということもあり、システム要件がはっきりしていません(単に自分が探せていないだけかもしれませんが)。System Center Technical Previewのシステム要件を確認するためのトライアンドエラー第3回目は、Operations Managerをインストールしていきます。
ダウンロードしてきたファイルを実行します。
[Next]ボタンを押します。

展開先を確認し、[Next]ボタンを押します。

[Extract]ボタンを押して、ファイルを展開します。

展開が完了したら、[Finish]ボタンを押して終了します。

展開先のフォルダーにあるセットアッププログラムを実行します。

[Download latest updates to the setup program]をクリックします。

[Install]をクリックします(2014年10月時点では特にセットアップ用の更新プログラムは出ていないようです)。

[Management server]と[Operaions console]をチェックし、[Next]ボタンを押します。


インストールパスは、デフォルトのままとするので、[Next]ボタンを押します。

やはりレポートビューアーが必要でした。リンク先をクリックしてみてバージョンを確認します。

System Center Technical Preview Operaions Managerは、Report Viewer 2012を使います(製品版は変わるかもしれませんね)。Windows Server Technical Previewに合わせて、

英語版を選択しダウンロードします。

インストールしますが、やはりMicrosoft System CLR Types for Microsoft SQL Server 2012も必要なので、


これもインストールします。


Report Viewer 2012をインストールします。


もう一度、インストール要件の事前確認を行います。もんだいないので、[Next]ボタンを押します。

マネジメントグループ名を設定し、[Next]ボタンを押します。

ライセンス条項を受諾するため、チェックボックスをチェックし、[Next]ボタンを押します。

SQL Serverへの接続情報、データベース名(デフォルトのままとしました)を指定し、[Next]ボタンを押します。

SQL Serverへの接続情報、データウェアハウスのデータベース名(デフォルトのままとしました)を指定し、[Next]ボタンを押します。

すべてのアカウントをサービスアカウント(ドメインアカウント)で置き換えます。

How to Install the First Management Server in a Management Groupの15番にしたがって、サービスアカウントを作成します。
Operations Manager Accountsも参考にできます。

サービスアカウントもどういう権限が必要かは、Security ConsiderationsのService Accounts配下を確認します。System Center Configuration service and System Center Data Access service accountは、OMのローカル管理者権限が必要である旨も、ここに書かれています。
Operations Manager Accountsも参考になります。
System Center Configuration service and System Center Data Access service accountをOperations ManagerのManagement Serverのローカル管理者グループに追加します。

Data Warehouse Write accountとData Reader accountは、Deploying System Center 2012 – Operations ManagerのRequired Accountsの表にある”Note”部分を確認すると良いです。ということで、SQL Server 2014でログイン権限を付与します。


サービスアカウントを設定したら、[Next]ボタンを押します。

CEIPとエラー報告は、それぞれYesを選択し、[Next]ボタンを押します。

Microsoft Updateは[On]を選択して有効化し、[Next]ボタンを押します。

構成内容を確認します。

構成内容を確認したら、[Install]ボタンを押してインストールを開始します。

※インストールに当たり、management serverおよびSQL Server 2014の動的メモリは最低メモリを3072MBにしてみました。この値未満だとインストールが非常に遅くなります。推測ですが、最低メモリはmanagement serverおよびSQL Server 2014で、それあぞれ4GB以上にしておくのが望ましいのでしょうね。
インストール中。

ライセンスアクティベーションの警告が出ていますが、PowerShellコマンドレットでないとできないのと評価版としてつかうので、このままにしておきます。
Operations Consoleが起動しないようにチェックを外し、

Microsoft Updateが起動するようにチェックを入れて、[Close]ボタンを押します。

やはり、System Center Technical Preview OM用の更新プログラムは2014年10月時点ではありませんでした。


最後にスタートメニューの問題がないことを確認します。OMは問題ないようです。

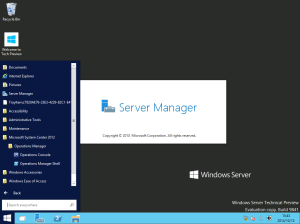
System Center Technical Preview Virtual Machine Managerをインストールしてみる
注)開発途中の製品ですので、あくまでも2014年10月時点の情報となります。今後開発が進むに従い、本記事の内容と差異が発生するはずです。これをもって、次期System Center がこうなると判断するのは早計ですので、ご注意ください。
System Center Technical Previewですが、開発途中ということもあり、システム要件がはっきりしていません(単に自分が探せていないだけかもしれませんが)。System Center Technical Previewのシステム要件を確認するためのトライアンドエラー第2回目は、Virtual Machine Managerをインストールしていきます。
ダウンロードしてきたファイルを実行します。
[Next]ボタンを押します。

展開先を確認し、[Next]ボタンを押します。
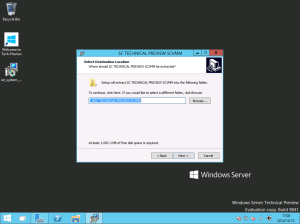
[Extract]ボタンを押して、ファイルを展開します。
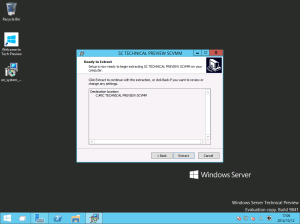
展開が完了したら、[Finish]ボタンを押して終了します。

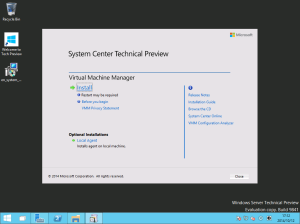
展開先のフォルダーにあるセットアッププログラムを実行します。
[Install]をクリックします。
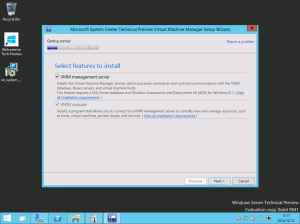
[VMM management server]をチェックし、[Next]ボタンを押します。
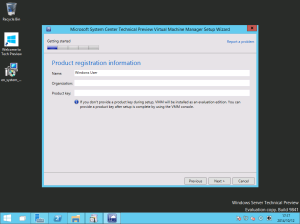
評価版として使うため、プロダクトキーのみ空欄のまま、[Next]ボタンを押します。
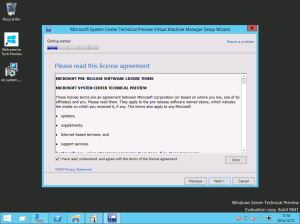
ライセンス条項を受諾するため、チェックボックスをチェックし、[Next]ボタンを押します。
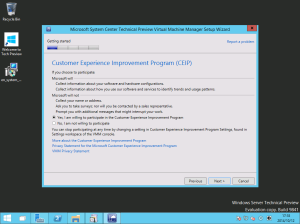
CEIPでYesを選択し、[Next]ボタンを押します。
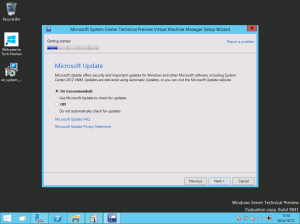
Microsoft Updateは[On]を選択して有効化し、[Next]ボタンを押します。
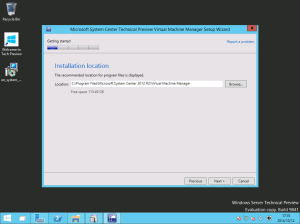
インストールパスは、デフォルトのままとするので、[Next]ボタンを押します。
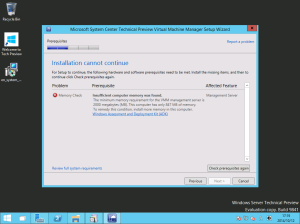
この画面では、大事なことを確認できました。System Center Technical Previewでは、まだWindows ADK 8.1を使うということです。
おそらくWindows Serverの次期版がリリースされたタイミングでWindows ADKも対応版がリリースされるのではないかと思います。それに伴いSystem Center VMMの次期版もWindows ADK 8.1ではなくなるはずと考えています。
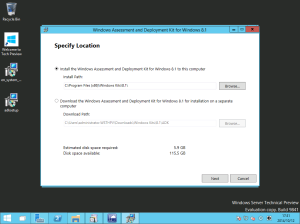
System Center Technical Previewでは、まだWindows ADK 8.1を使うので、ダウンロードします。

ダウンロードしてきたファイルを実行します。
インストールも行うので、ラジオボタンはデフォルトのままとし、[Next]ボタンを押します。
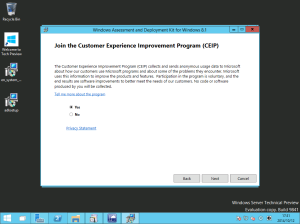
CEIPは、Yesを選択し、[Next]ボタンを押します。
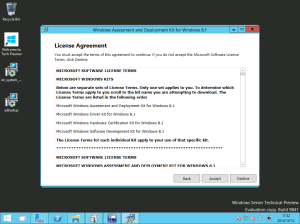
ライセンス条項を受諾するため、[Accept]ボタンを押します。
ここは、
だけを選びます。[install]ボタンを押します。
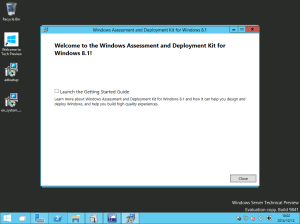
インストールが完了したら、[Close]ボタンを押して終了します。
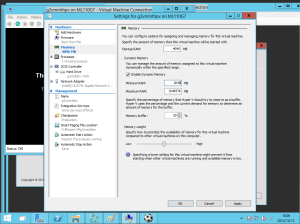
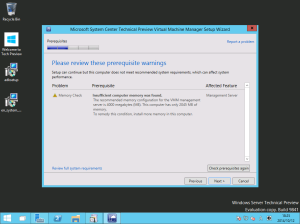
仮想マシンに割り当てた動的メモリの最小値が低すぎました。一旦仮想マシンをシャットダウン後、最低メモリを2048GBに変更して、起動しなおします。メモリの要件も現時点では、Hardware Requirements for System Center 2012 R2に順じているようです。
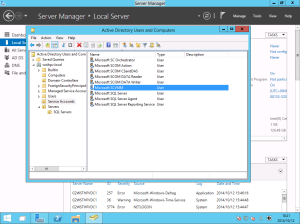
順番が逆転していますが、VMMのサービスアカウント(ドメインアカウント)を作成しておきます。
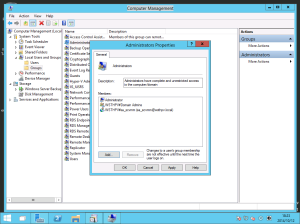
サービスアカウントをVMMサーバーのローカル管理者グループに追加しておきます(Specifying a Service Account for VMMに順じてます)。
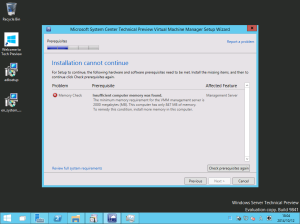
最低メモリが2048MB故に警告が出ていますが、インストールを続行します。[Next]ボタンを押します。
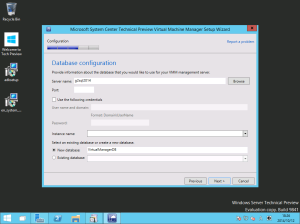
SQL Serverへの接続情報、データベース名(デフォルトのままとしました)を指定し、[Next]ボタンを押します。
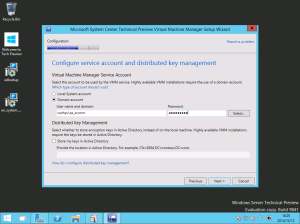
先ほど作成したサービスアカウントを指定します。
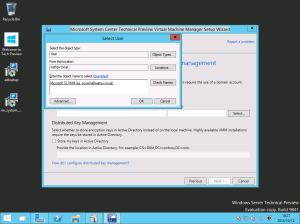
と選択したはずのユーザー名がテキスト入力ボックスに入ってきません。数回繰り返しましたが、ダメでした。ここはフィードバックポイントのようです。
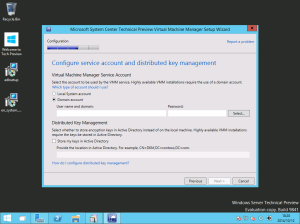
ということで、サービスアカウントとパスワードを手入力します。
分散キー管理は複数台を使うときに必要ですが、今回は評価用の一台だけなので、入力を省略します。[Next]ボタンを押します。
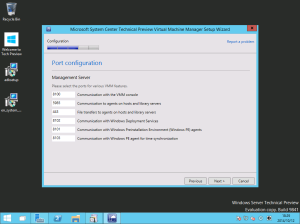
ポート番号はデフォルトのままとするので、[Next]ボタンを押します。
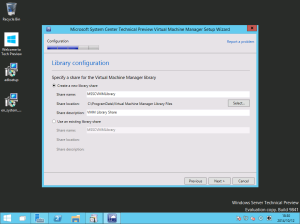
ライブラリー構成はデフォルトのままとするので、[Next]ボタンを押します。
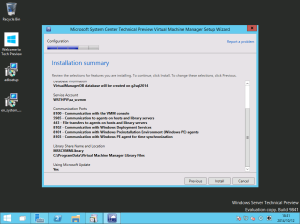
構成を確認します。
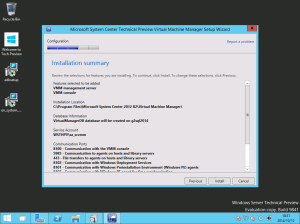
構成を確認したら、[Install]ボタンを押してインストールを開始します。
インストールが完了したら、VMMコンソールが起動しないようにチェックボックスを外し、
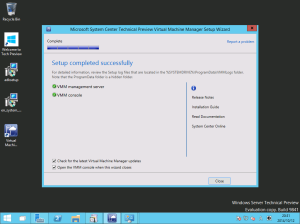
[Close]ボタンを押して終了します。
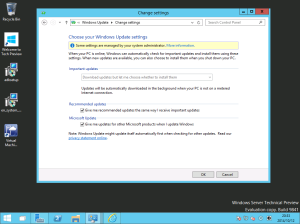
Windows Updateの設定を有効化します。
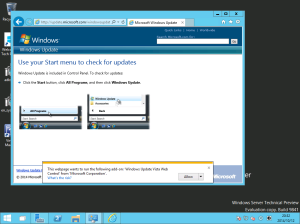
[Recommended updates]をチェックします。
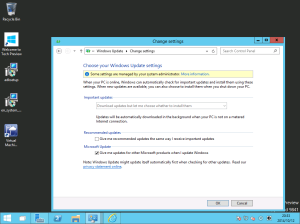
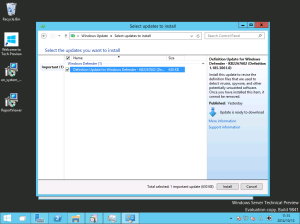
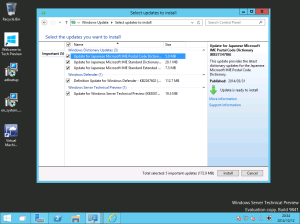
2014年10月時点では、Windows Server Technical Preview用の更新プログラムリリースされているのみでした。更新プログラムを適用しておきます。
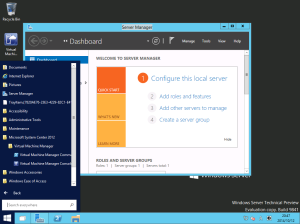
Orchestratorのスタートメニュー項目が見えない件があったので、こちらは問題ないか確認してみました。
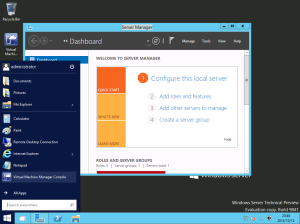
メニュー項目としては、問題なく表示されています。
System Center Technical Previewですが、開発途中ということもあり、システム要件がはっきりしていません(単に自分が探せていないだけかもしれませんが)。System Center Technical Previewのシステム要件を確認するためのトライアンドエラー第2回目は、Virtual Machine Managerをインストールしていきます。
ダウンロードしてきたファイルを実行します。
[Next]ボタンを押します。

展開先を確認し、[Next]ボタンを押します。

[Extract]ボタンを押して、ファイルを展開します。

展開が完了したら、[Finish]ボタンを押して終了します。

展開先のフォルダーにあるセットアッププログラムを実行します。
[Install]をクリックします。

[VMM management server]をチェックし、[Next]ボタンを押します。

評価版として使うため、プロダクトキーのみ空欄のまま、[Next]ボタンを押します。

ライセンス条項を受諾するため、チェックボックスをチェックし、[Next]ボタンを押します。

CEIPでYesを選択し、[Next]ボタンを押します。

Microsoft Updateは[On]を選択して有効化し、[Next]ボタンを押します。

インストールパスは、デフォルトのままとするので、[Next]ボタンを押します。

この画面では、大事なことを確認できました。System Center Technical Previewでは、まだWindows ADK 8.1を使うということです。
おそらくWindows Serverの次期版がリリースされたタイミングでWindows ADKも対応版がリリースされるのではないかと思います。それに伴いSystem Center VMMの次期版もWindows ADK 8.1ではなくなるはずと考えています。

System Center Technical Previewでは、まだWindows ADK 8.1を使うので、ダウンロードします。

ダウンロードしてきたファイルを実行します。
インストールも行うので、ラジオボタンはデフォルトのままとし、[Next]ボタンを押します。

CEIPは、Yesを選択し、[Next]ボタンを押します。

ライセンス条項を受諾するため、[Accept]ボタンを押します。

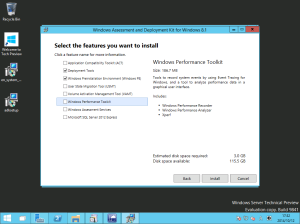
ここは、
- Deployment Tools
- Windows Preinstration Enviroment
だけを選びます。[install]ボタンを押します。

インストールが完了したら、[Close]ボタンを押して終了します。

仮想マシンに割り当てた動的メモリの最小値が低すぎました。一旦仮想マシンをシャットダウン後、最低メモリを2048GBに変更して、起動しなおします。メモリの要件も現時点では、Hardware Requirements for System Center 2012 R2に順じているようです。


順番が逆転していますが、VMMのサービスアカウント(ドメインアカウント)を作成しておきます。

サービスアカウントをVMMサーバーのローカル管理者グループに追加しておきます(Specifying a Service Account for VMMに順じてます)。

最低メモリが2048MB故に警告が出ていますが、インストールを続行します。[Next]ボタンを押します。

SQL Serverへの接続情報、データベース名(デフォルトのままとしました)を指定し、[Next]ボタンを押します。

先ほど作成したサービスアカウントを指定します。

と選択したはずのユーザー名がテキスト入力ボックスに入ってきません。数回繰り返しましたが、ダメでした。ここはフィードバックポイントのようです。

ということで、サービスアカウントとパスワードを手入力します。
分散キー管理は複数台を使うときに必要ですが、今回は評価用の一台だけなので、入力を省略します。[Next]ボタンを押します。

ポート番号はデフォルトのままとするので、[Next]ボタンを押します。

ライブラリー構成はデフォルトのままとするので、[Next]ボタンを押します。

構成を確認します。

構成を確認したら、[Install]ボタンを押してインストールを開始します。

インストールが完了したら、VMMコンソールが起動しないようにチェックボックスを外し、

[Close]ボタンを押して終了します。

Windows Updateの設定を有効化します。

[Recommended updates]をチェックします。


2014年10月時点では、Windows Server Technical Preview用の更新プログラムリリースされているのみでした。更新プログラムを適用しておきます。

Orchestratorのスタートメニュー項目が見えない件があったので、こちらは問題ないか確認してみました。

メニュー項目としては、問題なく表示されています。

登録:
コメント (Atom)