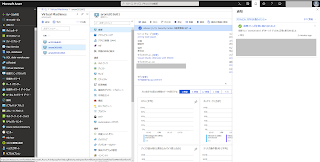
Windows Admin Center から Azure Backup の設定を行おうとしています。
でもその前に、Windows Admin Center から Azure との連携(Azure インテグレーション)が必要です。
本稿は、そこをまとめておきます。
Windows Admin Center の Azure Backup にアクセスしても、Azure連携Azure インテグレーションされていないと、下記の画面になります。

というわけで、Windows Admin Center の Azure インテグレーションから設定を進めるので、[登録]をクリックします。

インテグレーション用のコードが表示されるので、[コードをコピーします]をクリックし、[デバイスにログインします。]リンクをクリックします。

コードを貼り付けて、[続行]をクリックします。

Azureにサインインします。


AADのテナントIDを選択し、[登録]をクリックします。

登録完了。


ここまで終わると、Azure Backup含むいくつかのAzureサービスが使えます。
次回は、Windows Admin CenterからAzure Backupを設定してみます。
※2018/11/03 追記

に書かれている通り、Azureポータルでアクセス権の追加が必要でした!
以下、その手順を追記します。
上記画面の[Azure AD アプリの登録に移動します]をクリックします。
[設定]→[必要なアクセス許可]を開いて、[アクセス許可の付与]をクリックします。
[はい]をクリックします。

以上で、Windows Admin Center から Azure Backup が設定できます。
でもその前に、Windows Admin Center から Azure との連携(Azure インテグレーション)が必要です。
本稿は、そこをまとめておきます。
Windows Admin Center の Azure Backup にアクセスしても、Azure連携Azure インテグレーションされていないと、下記の画面になります。

というわけで、Windows Admin Center の Azure インテグレーションから設定を進めるので、[登録]をクリックします。

インテグレーション用のコードが表示されるので、[コードをコピーします]をクリックし、[デバイスにログインします。]リンクをクリックします。

コードを貼り付けて、[続行]をクリックします。

Azureにサインインします。


AADのテナントIDを選択し、[登録]をクリックします。

登録完了。


ここまで終わると、Azure Backup含むいくつかのAzureサービスが使えます。
次回は、Windows Admin CenterからAzure Backupを設定してみます。
※2018/11/03 追記

に書かれている通り、Azureポータルでアクセス権の追加が必要でした!
以下、その手順を追記します。
上記画面の[Azure AD アプリの登録に移動します]をクリックします。
[設定]→[必要なアクセス許可]を開いて、[アクセス許可の付与]をクリックします。
[はい]をクリックします。

以上で、Windows Admin Center から Azure Backup が設定できます。


