今回は、Azure Operational Insights Previewから直接監視するための方法をまとめます。
こちらも、既に手順が公開されています。
Microsoft Monitoring Agent のダウンロードとインストール
Get started with Operational Insights 1. Install Microsoft Monitoring Agent
Microsoft Monitoring Agent のダウンロードとインストールは、Azureの管理コンソールからアクセスできます。
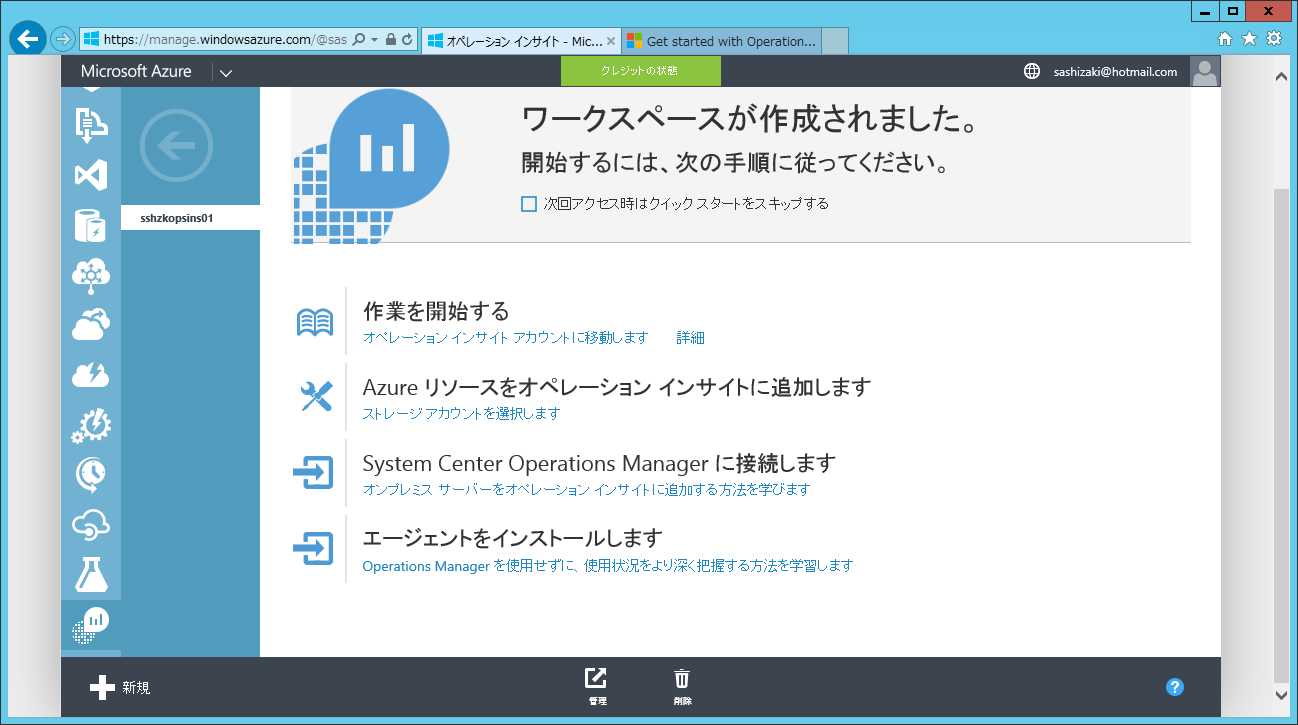
Microsoft Monitoring Agent のダウンロードとインストールの画面です。

Get started with Operational Insights 1. Install Microsoft Monitoring Agentの画面です。

ここから、ステップバイステップで手順を確認していきます。
Operational Insightsポータルで、「Servers and Usage」をクリックします(この画面だと、赤いタイルです)。

「Configure」をクリックします。

(グレーアウトしてありますが)「Workspace ID」と「Primary workspace key」をメモしておきます。

このページの
1.Download the agent setup file:
Agent (64-bit)
からAgentをダウンロードしておきます。64bit版のみのようですね。
管理対象のWindows Serverにサインインして、ダウンロードしたファイルを実行します。Microsoft Monitorting Agnetのインストールウィザードが起動してきますので、[次へ]ボタンを押します。

ライセンス条項に同意します。
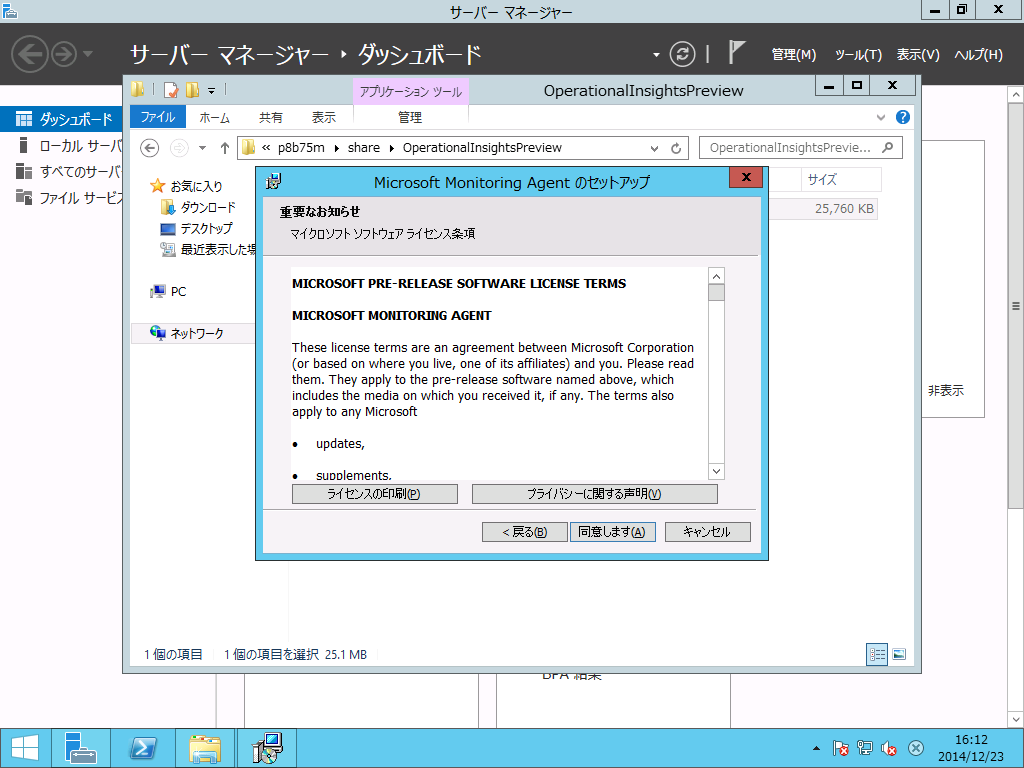
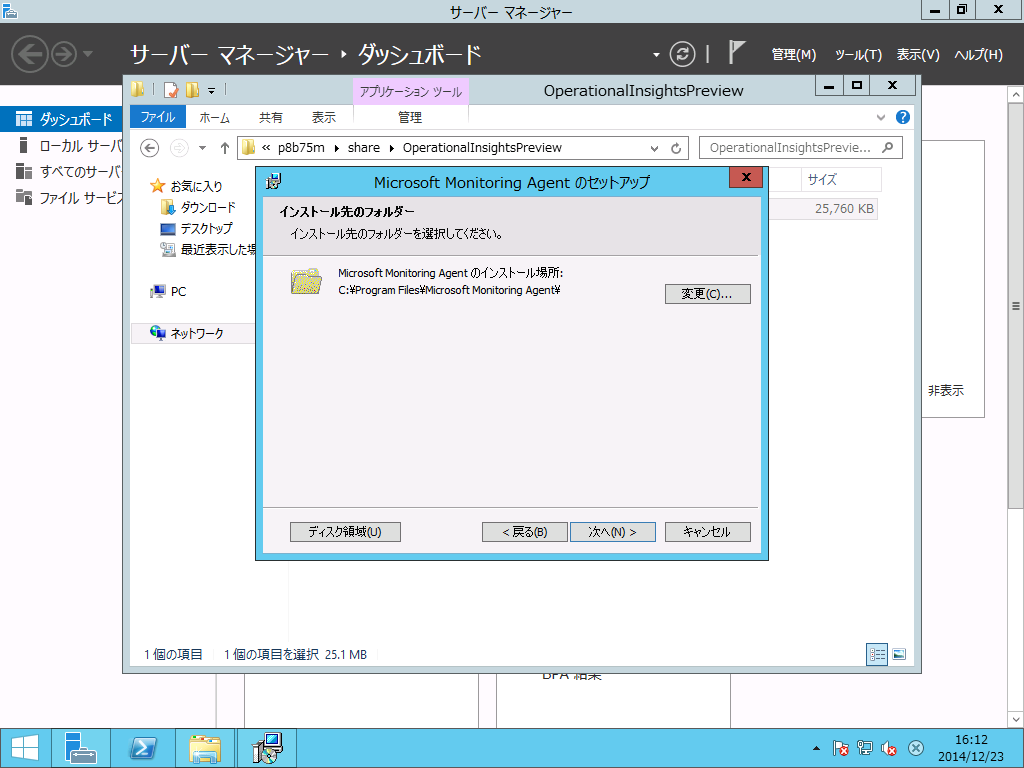
[次へ]ボタンを押します。
ここでは[エージェントをMicorosoft Operational Insightsに接続する]をチェックします。

[次へ]ボタンを押します。

[ワークスペースID]へ「Workspace ID」、[ワークスペースキー]と「Primary workspace key」を入力し、[次へ]ボタンを押します。

[インストール]ボタンを押します。

しばらく待つとインストールが完了しますので、[完了]ボタンを押してウィザードを終了します。

コントロールパネルを開いて何が起きたかみてみます「Microsoft Monitoring Agent」が増えています。

「Azure Operational Insights」タブをクリックすると先ほど入力した情報が設定されていますね。

再びAzure Operational Insightsポータルへアクセスし、「Servers and Usage」をクリック、
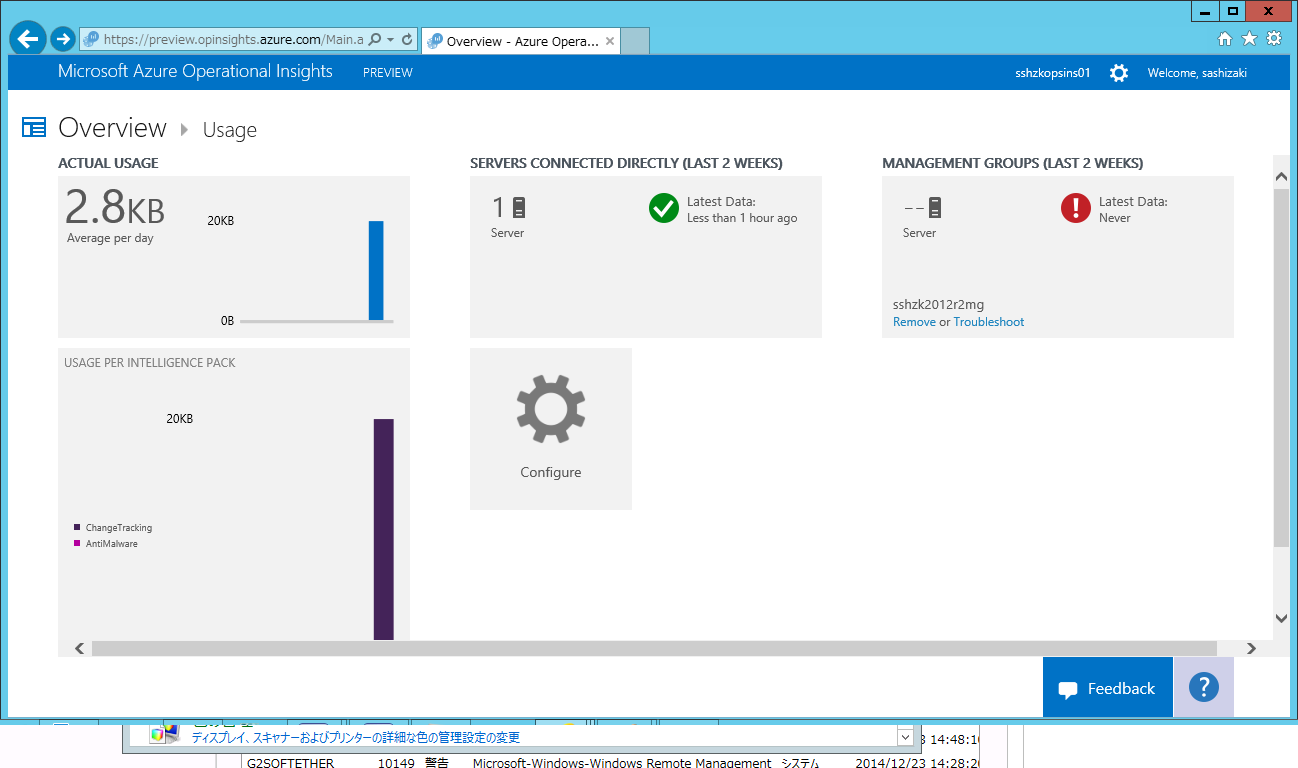
しばらく待つと情報がアップロードされたことがわかります。
以上で、Azure Operational Insights Previewから直接監視が可能になりました。参考になれば幸いです。
0 件のコメント:
コメントを投稿