から管理パックとガイドがダウンロードできます。
管理パックとガイド(Office 365 MP Operations Guide.docx)をダウンロードしたら、

管理パックのMSIファイルを実行します。
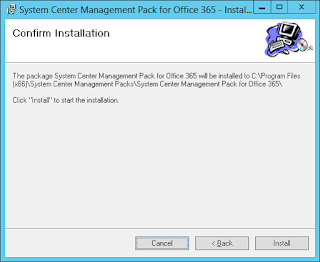
基本的には、ウィザード画面にしたがって、ファイルを展開します。


ファイルが展開先は"C:\Program Files (x86)\System Center Management Packs"配下になります。


"C:\Program Files (x86)\System Center Management Packs\System Center Management Pack for Office 365"に管理パックが展開されました。

SCOMの管理→管理パックをクリックします。
そこから管理パックのインポートを行います。

管理パックを追加します。

ディスクから管理パックを追加します。

管理パックの依存性を解決するためにオンラインカタログへのアクセスを許可します。

"C:\Program Files (x86)\System Center Management Packs\System Center Management Pack for Office 365"から管理パックを読み込みます。

管理パックに依存関係がないので、このままインポートを進めます。

インポート完了。

管理パックの画面でも、インポート完了したことを確認できました。

ガイド(Office 365 MP Operations Guide.docx)の「Configuring the Management Pack for Office 365」→「Cloud user account configuration」のとおり、全体管理者が構成必須です。今回は、すでに全体管理者を構成済みなので、そこは説明を省略します。
実行用のプロファイルは、下記の二つが追加されます。詳細は、ガイド(Office 365 MP Operations Guide.docx)の「Configuring the Management Pack for Office 365」→「Configure Run As Profiles」を参照ください。
なお「Office 365 Subscription Password secure reference」は、後ほど構成を確認します。

Office 365サブスクリプションを関連付けていきます。[Add Subscription]をクリックします。

SCOMで識別するための名前を入力します。した二つの入力フィールドには、Office 365へ接続するユーザー名とパスワードを入力します。

Management Server Poolへの関連付けを行い、[Add Subscription]を押します。

関連付けが完了。[Finish]ボタンを押して、ダイアログを閉じます。

設定画面上でも関連付けが確認できます。

「Office 365 Subscription Password secure reference」に設定が入ったのか確認してみます。


先ほどの関連付けで設定した情報が登録されているようです。

監視可能になりましたので監視画面へ移動して、Active Alertsを見てみます。Criticalなイベントが監視できていますね。

ダッシュボードの表示も確認できます。

以上のことからSystem Center Management Pack for Office 365は、簡単に構成できることを確認しました。
参考になれば幸いです。
0 件のコメント:
コメントを投稿